nopAccelerate
Configuring nopAccelerate Solr Plugin for nopCommerce 2.80
Ensuring nopCommerce settings & configuring nopAccelerate Solr Plugin settings for integrating Apache Solr correctly with your nopCommerce store.
Applicable to
- nopAccelerate
- nopAccelerate Lite
- nopAccelerate Search
- nopAccelerate Search Lite
General Settings
It is very important that your store is configured properly before you proceed further with Configuring Solr Plugins. Ensure that you’ve entered correct Store URL in your nopCommerce Administrator Area.
Login to your Store administration area, and then go to: Configuration > Settings > General and Miscellaneous Settings.
Note that your Store URL should start with “http://” and end with “/“, eg. http://www.yourdomain.com/
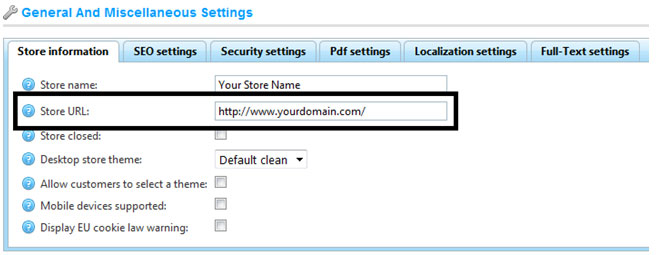
If it is not configured correctly, please update the URL and Save.
Configuring Solr Core Plugin Settings
Step 1: Open Solr Admin Area
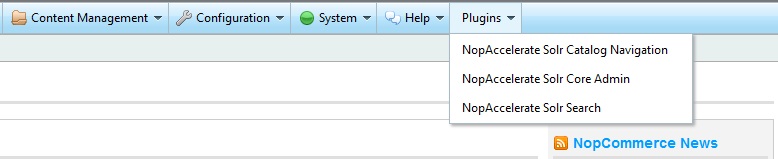
Open the Solr Core Configuration under Solr Admin Area for your nopCommerce store. You can open it by going to nopCommerce administration area menu Plugins > nopAccelerate Solr Core Admin.
This will open a Solr Admin Area for your nopCommerce store. While accessing it for first time, you will be asked for entering a License Key.
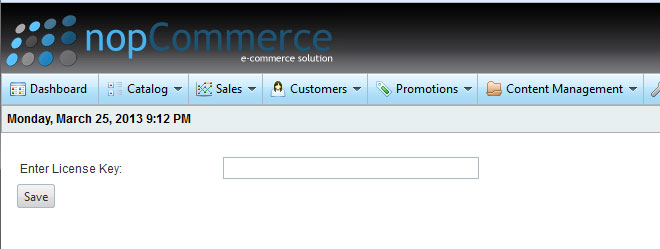
Enter license key you’ve received by email and click on Save to proceed further.
Hint: License Keys for nopAccelerate Solr Plugins
Each nopAccelerate Solr Plugins requires you to enter a License Key before you can access the admin area of the Plugin. The license key for each plugins are unique and help us validate the trial & bought licenses. License Keys will be generated on-the-fly and sent to your registered email once your order is fully paid. For Trial order, it is generated & sent to your email after successful manual verification is done. If you haven’t yet received a License Key, please contact us for help.
Moreover, if you have entered a wrong license key by mistake, then please contact us for instruction on changing license key.
After Saving License Key, you’ll be redirected to the Solr Admin Area for your nopCommerce store.
Step 2: Configuring Solr Core Settings
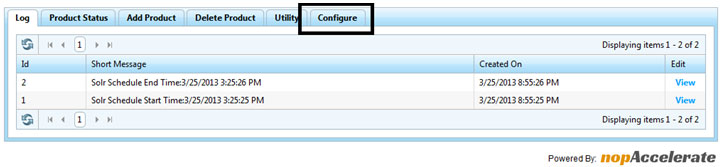
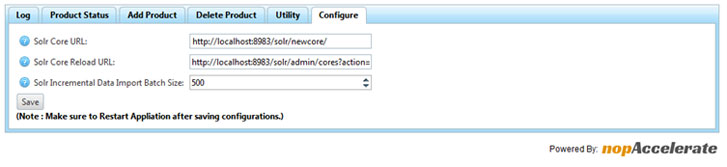
Click on Configure to proceed further Configuring Solr Core Plugin for your store.
Solr Core URL
You need to enter the Solr Core URL, Solr Core Reload URL & Solr Incremental Data Import Batch Size here.
If you’re using Self-hosted Solr Instance, then your Solr Core URL will be referring to local Solr instance.
For example:
http://<hostname>:<port>/<solr-app-name>/<core-name>
e.g. http://localhost:8983/solr/newcore
If you’re using remotely hosted Solr instance, then you will need to enter the address provided by your Solr hosting provider here.
Solr Core Reload URL
You can build your Solr Core Reload URL very easily.
For example:
http://<hostname>:<port>/<solr-app-name>/admin/cores?action=RELOAD&core=<core-name>
eg. http://localhost:8983/solr/admin/cores?action=RELOAD&core=newcore
Hint: Reloading Solr Core
Sometimes, you might need to manually reload the Solr Core to see the Products you’ve committed manually to the Solr Index.
Newer version of Plugin will have feature to support two Solr Core, one additional core specially for performing indexing operation to bring further performance benefits.
Solr Incremental Data Import (IDI) Batch Size
This batch size depends on your application server resources and traffic you have on your site. This process is resource intensive and will consume almost 40-60% of CPU depending on your server configurations. We suggest keeping it between 100 to 500 and experiment to find the best value.
Once, these values are defined, click on Save and Restart Application to make changes. You can now proceed to next step of Performing Full Indexing.
Hint: Understanding Solr IDI Process Batch Size
As you already know we need to add products into Solr index before Solr can be used for performing queries. For a smaller site, this operation is easy & doesn’t take more than few minutes. But for an e-commerce store with large catalog size this operation could take quite some time before all of the products are being indexed by Solr.
To make it easy and reliable, the Solr Core plugin sends the products for indexing in certain batch size. Once one batch finishes, another starts. And so on all products will be indexed by Solr. Solr Core plugin keeps track of what products are already indexed and what products are pending. Once all products are indexed, the process stops.
Solr Core plugin also tracks products that are edited, deleted or newly added and refreshes the Solr index at set interval. Currently it is managed by a nopCommerce Scheduled Task. If the number of products changed are more than configured batch size then the IDI process will run multiple times until all changed products are indexed by Solr.
For more details, review Understanding Solr IDI Process.
← Back to Installing nopAccelerate Solr Plugins in NopCommerce
Proceed with next step to Performing Full Indexing→
Need more help?
- Ask your question in the Forums (free with your plugin purchase)
- Go back to Documentation
Latest Posts


Our Products
Support
Latest Blog Posts
Contact Info