Enjoyed this post?
Be sure to subscribe to the nopAccelerate newsletter and get regular updates about awesome posts just like this one and more!
Artificial Intelligence (AI) is transforming how developers write, review, and optimize code. From smart completion to automated refactoring, AI is now a genuine teammate in every modern IDE.
Tools like GitHub Copilot or ChatGPT already boost productivity. But what if your AI assistant actually understood your project, your architecture, naming conventions, and design patterns?
That’s where building your own custom AI-powered code assistant makes sense.
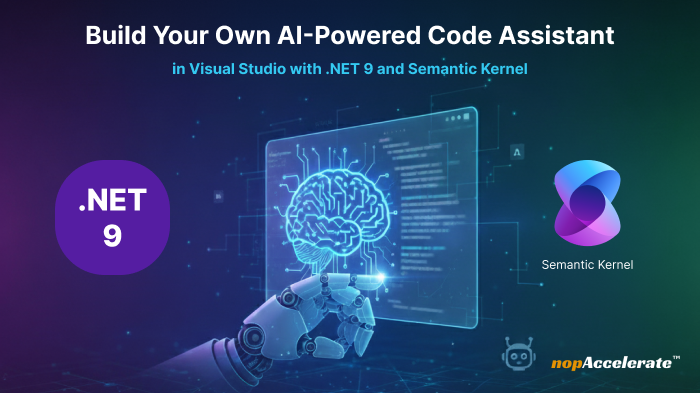
In this guide, you’ll learn how to create one inside Visual Studio using .NET 9 and Microsoft Semantic Kernel, Microsoft’s open-source SDK for integrating large-language-model intelligence into .NET apps. By the end, you’ll have a working assistant that can generate C# snippets, answer project-specific questions, and even live inside your IDE.
TL;DR: Learn to build an intelligent code assistant using .NET 9 + Semantic Kernel with OpenAI integration, reusable prompts, and Visual Studio extensions.
With .NET 9, Microsoft delivers its most AI-ready stack yet introducing Microsoft.Extensions.AI, Tensor enhancements, and faster Native AOT. Whether you’re an engineer experimenting with AI tooling or a tech lead exploring automation in dev workflows, this tutorial will walk you through each stage of creating, extending, and securing your own assistant.
Most developers rely on general-purpose assistants. They’re useful, but they don’t know your domain, internal frameworks, or project constraints. Building your own gives you control.
A 2025 survey found around 80 % of teams now use AI in development workflows, reporting 15–20 % productivity gains. A custom assistant lets you keep those gains while maintaining your code quality and security standards.
For .NET teams and software consultancies especially those building enterprise or eCommerce solutions this is a strategic investment in developer efficiency and knowledge reuse.
Before you start, make sure your environment is ready.
You’ll need:
Tip: Create a dedicated solution just for AI experimentation so you can debug and iterate freely without affecting production code.
Let’s start with a basic console application that will power your assistant.
1 Create a New Project
2 Install Semantic Kernel
dotnet add package Microsoft.SemanticKernel(Optional) Add the new AI extension library:
dotnet add package Microsoft.Extensions.AIThese packages make connecting to AI models straightforward and reusable.
3 Build the solution (Ctrl + Shift + B) to confirm setup.
At this point, you’ve laid the foundation for a C# AI assistant now ready to connect with OpenAI.
Now let’s teach your assistant to “talk” to GPT-4 using Semantic Kernel.
Get an API Key → platform.openai.com → View API Keys → Create new secret key.
Store it securely (using User Secrets or Key Vault):
dotnet user-secrets set “OPENAI_API_KEY” “your-api-key”
Configure Semantic Kernel:
using Microsoft.SemanticKernel;
var builder = Kernel.CreateBuilder();
builder.AddOpenAIChatCompletion(
 modelId: "gpt-4-turbo",
apiKey: Environment.GetEnvironmentVariable("OPENAI_API_KEY")
);var kernel = builder.Build();

Console.WriteLine("Connected to OpenAI successfully!");
Run (F5): You should see Connected to OpenAI successfully!
Security Best Practice: Never commit API keys to source control. Use environment variables for safety and portability.
Here’s where it gets fun, turning natural language into real code.
using Microsoft.SemanticKernel;
using Microsoft.SemanticKernel.ChatCompletion;
using System;
using System.Threading.Tasks;

var builder = Kernel.CreateBuilder();
builder.AddOpenAIChatCompletion(
    modelId: "gpt-4o-mini", // cheaper for dev
    apiKey: Environment.GetEnvironmentVariable("OPENAI_API_KEY")!
);
var kernel = builder.Build();

// Create function from prompt
var generateCode = kernel.CreateFunctionFromPrompty(@"
You are an expert .NET 9 and C# assistant.
Generate clean, production-ready C# code.
- Follow PascalCase, async/await
- Add XML documentation
- Output code only in ```csharp block

Request: {{$input}}
");

// Interactive loop
while (true)
{
    Console.Write("Request (or 'exit'): ");
    var input = Console.ReadLine();
    if (input?.Trim().ToLower() == "exit") break;

    var result = await kernel.InvokeAsync(generateCode, new() { ["input"] = input });
    Console.WriteLine("\n```csharp\n" + result.GetValue<string>() + "\n```");
}
Now you can type something like:
“Create a repository class for products using async methods.”
…and watch it generate ready-to-paste C# code with proper naming and XML docs.
Think of this as your own lightweight Copilot but customized to how your team writes code.
So far, your assistant creates generic code. But what if it could understand your project?
That’s where embeddings come in. They turn text into vectors, letting the AI “remember” your own files.
Add the Embedding Connector
dotnet add package Microsoft.SemanticKernel.Connectors.OpenAIStore Project Information
using Microsoft.SemanticKernel.Memory;

var kernel = new Kernel.CreateBuilder()
    .AddOpenAIChatCompletion("gpt-4o", apiKey)
    .AddOpenAITextEmbeddingGeneration("text-embedding-3-large", apiKey) // any live embedding model
    .Build();

await kernel.Memory.SaveInformationAsync(
    collection: "project-docs",
    text: "Customer repository uses interface ICustomerRepository with async methods.",
    id: "repo-notes-1");
Retrieve Relevant Context
var query = "generate a method that works with ICustomerRepository";var results = kernel.Memory.SearchAsync("project-docs", query, limit: 2);await foreach (var item in results)
    Console.WriteLine($"Relevant: {item.Metadata.Text}");
You can inject these results into your prompt before invoking the model, so it writes code that fits your existing architecture.
You’re not training a model; you’re teaching it context on demand like a shared memory for your solution.
You can run your assistant as a console app, but embedding it inside Visual Studio makes it part of your daily workflow.
Create a VSIX Project named CodeAssistant.VSIX.
Add a Tool Window: A dockable panel with prompt input and output fields.
Share your logic: Move the Semantic Kernel code into a shared class library (CodeAssistant.Core) so both the console and VSIX can use it.
Connect it:
private async void RunButton_Click(object sender, RoutedEventArgs e)
{
    var prompt = PromptTextBox.Text;
    try
    {
        var result = await _kernel.InvokeAsync(
            _codeAssistant["Generate"],
            new KernelArguments { { "input", prompt } });

        OutputTextBox.Text = result.GetValue<string>();
    }
    catch (Exception ex)
    {
        OutputTextBox.Text = $"Error: {ex.Message}";
    }
}
Use async to avoid blocking the UI.
This creates a dockable assistant window inside Visual Studio, a familiar experience for your team.
You can later expand it to read the active document, auto-suggest snippets, or analyze selected code.
For internal use, distribute your VSIX through your organization’s private feed so everyone can install it securely.
Your assistant is now a solid foundation. Here are ideas to extend it:
Once you’ve stabilized a few features, treat your assistant as a reusable internal tool version it, share it, improve it like any library.
Keep logs during experiments, you’ll learn how different prompts affect output quality and latency.
With .NET 9 and Microsoft Semantic Kernel, building a custom AI-powered code assistant in Visual Studio is no longer just an idea, it’s a practical reality.
You’ve connected OpenAI, generated C# snippets, added memory with embeddings, and explored IDE integration. What began as a console demo can evolve into a powerful AI companion that mirrors your team’s coding standards and architecture.
AI isn’t replacing developers, it’s amplifying them. By offloading repetitive tasks and suggesting patterns, AI frees engineers to focus on design and innovation.
Start small, experiment openly, and refine your workflow. When ready to bring your assistant to production or extend it into enterprise-grade tools, partner with experienced .NET and AI developers who understand both sides of modern software engineering.


February 2, 2026


Leave A Comment