Enjoyed this post?
Be sure to subscribe to the nopAccelerate newsletter and get regular updates about awesome posts just like this one and more!

Learning how to merge branches in GitLab is essential for developers and DevOps engineers who want smooth collaboration and reliable code history. Version control is a cornerstone of modern software development, and GitLab, a popular Git repository manager, offers powerful tools for managing branches and workflows. For those who prefer graphical interfaces over command-line Git, TortoiseGit provides an intuitive Windows shell extension to perform Git operations visually.
This step-by-step guide walks you through the complete process of merging branches in GitLab using TortoiseGit, from repository setup to conflict resolution and pushing changes back to GitLab, all without using the command line. Whether you’re new to Git or transitioning from CLI to GUI tools, these instructions will help you merge branches confidently and effectively.
GitLab is a web-based platform that hosts Git repositories and integrates Continuous Integration/Continuous Deployment (CI/CD) workflows. It centralizes source control, project management, and automation, facilitating collaboration across distributed teams.
TortoiseGit is a graphical Git client for Windows that integrates directly with Windows Explorer. It simplifies common Git tasks by providing an accessible interface for users who prefer not to use command-line tools, making it ideal for developers and technical teams embracing GUI workflows.
Before you begin, ensure you have:
Open your GitLab project in a browser and copy the repository’s HTTPS or SSH URL.
In Windows Explorer, navigate to the directory where you want the local copy.
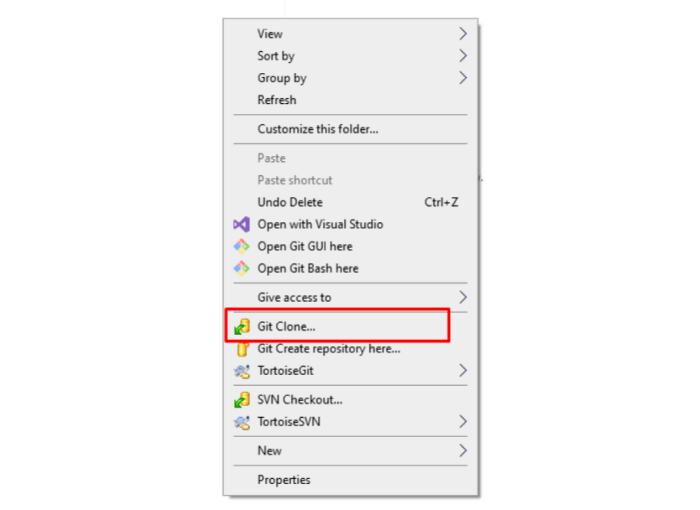
Right-click inside the folder and select Git Clone… from the TortoiseGit menu.
Paste the repository URL into the URL field and click OK.
Wait for the repository to clone successfully onto your local machine.
Note: If you already have the repository cloned locally, you can skip this step.
If you plan to use SSH URLs:
Tip: You can configure settings globally for all repositories, or locally for this specific repository.
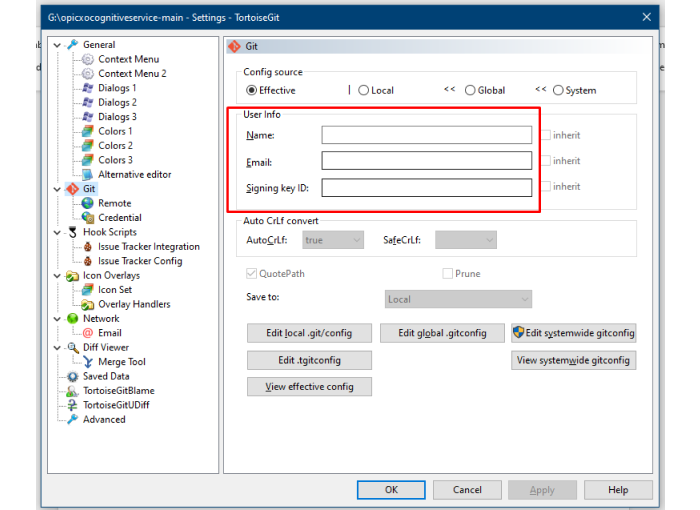
Before merging:
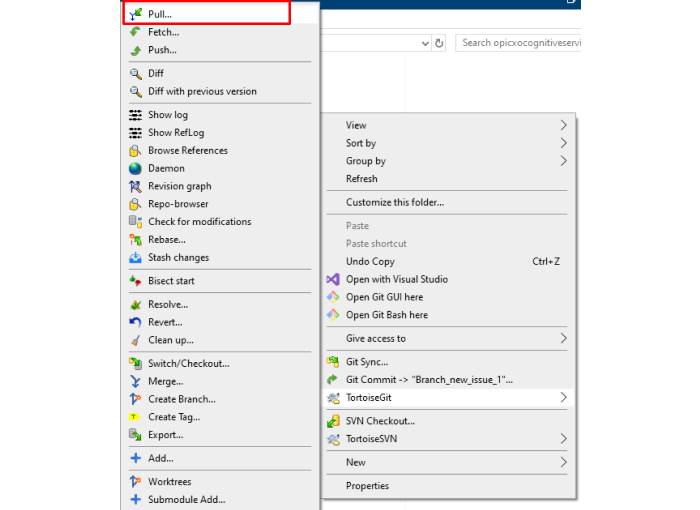
Right-click the repository folder.
Go to TortoiseGit > Switch/Checkout…
Select the branch you want to merge into (e.g., main or develop).
Click OK to switch your working directory to the target branch.
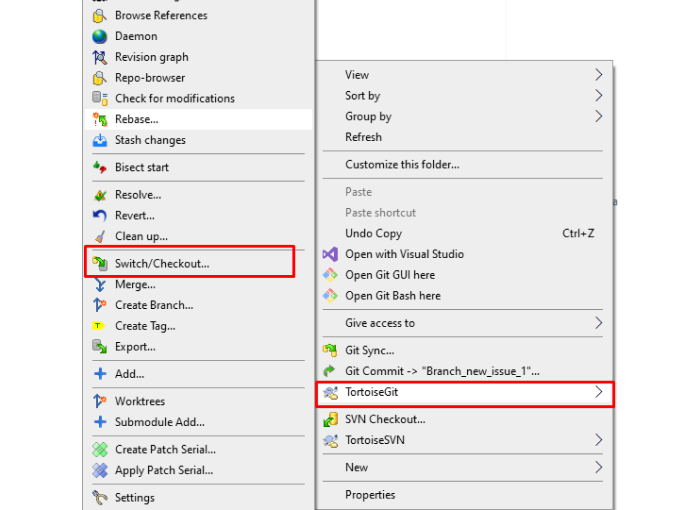
Right-click the repository folder again.
Select TortoiseGit > Merge…
In the Merge dialog, choose the source branch you want to merge from.
Click OK to initiate the merge.
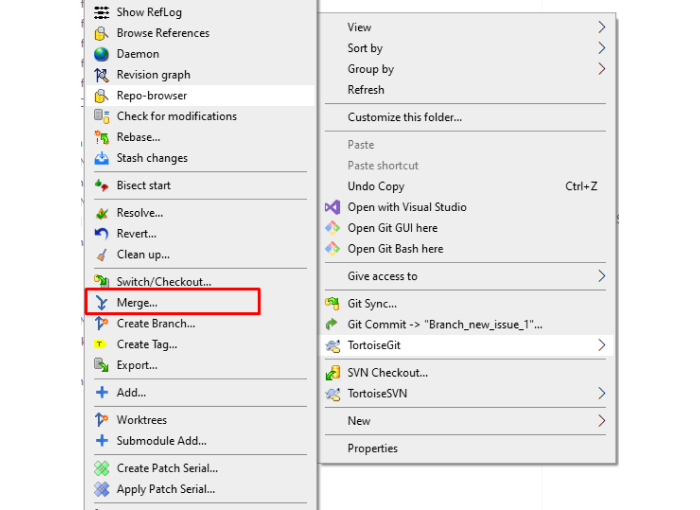
Note:- You are merging the selected source branch into the currently checked-out target branch.
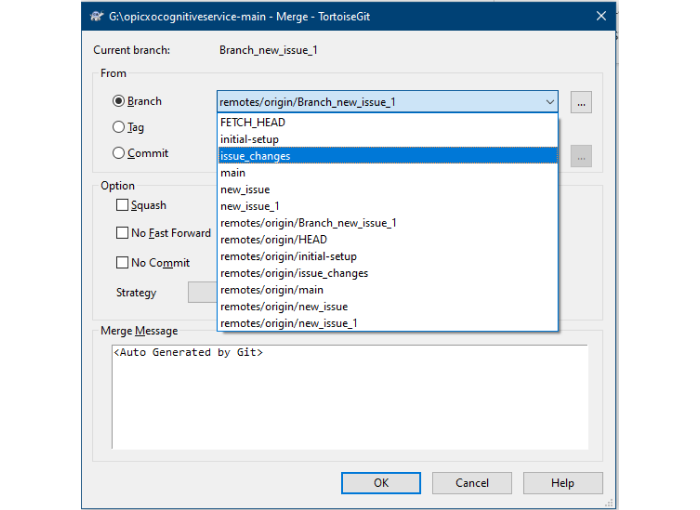
If your branches have conflicting changes, TortoiseGit will notify you.
Click Edit Conflicts to open TortoiseGitMerge.
Review conflicting files side-by-side.
Choose which changes to keep or edit manually.
Save the file, then mark it as Resolved in TortoiseGit.
Commit the resolved files to continue the merge process.
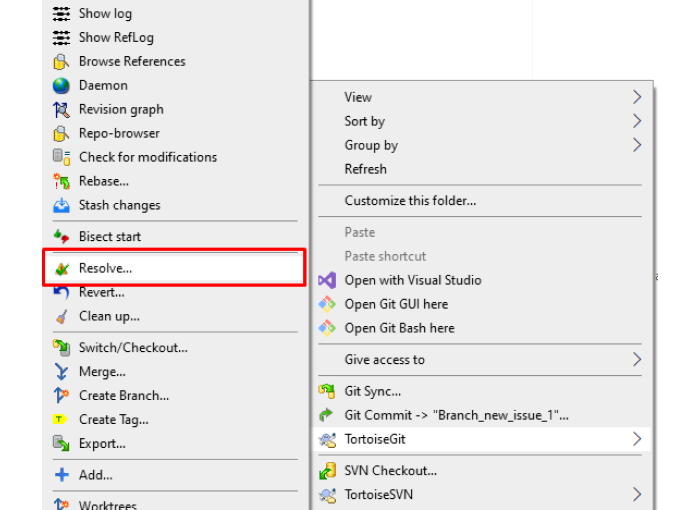
Note:- Select all modified files then commit your changes (Ok).
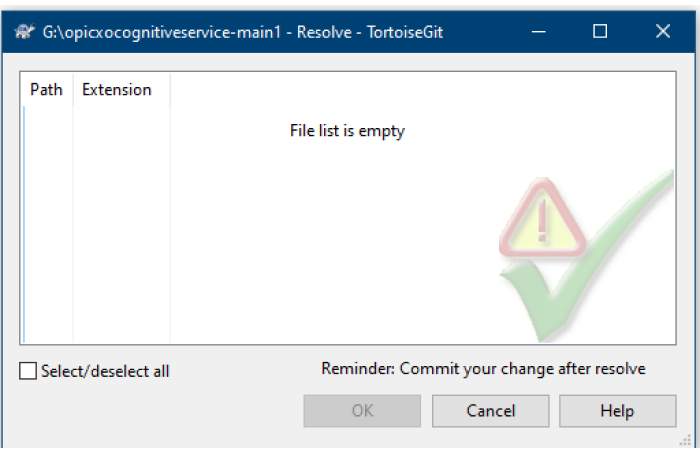
Use TortoiseGit’s overlay icons in Windows Explorer to check file status:
Note: Icons indicate file states, not merge success/failure. Always test your application locally after a merge to confirm functionality.
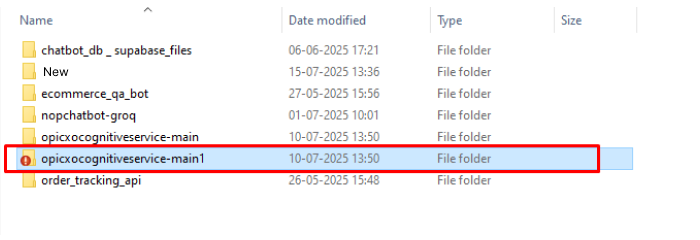
Right-click the repository folder and select TortoiseGit > Commit…
Review all changes in the commit dialog.
Enter a clear and descriptive commit message explaining the merge (e.g., “Merged feature-branch into main”).
Click OK to commit the merge locally.
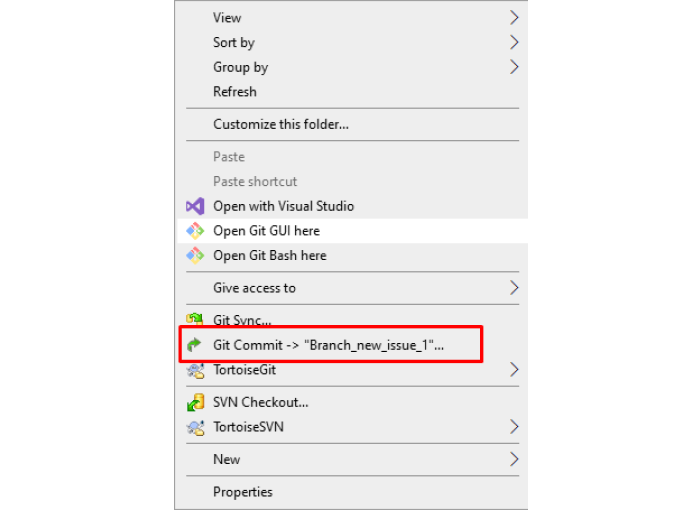
Note:- Select all files for modified by you. Then commit or push or commit&push, also make sure enter a descriptive commit message in the message box.
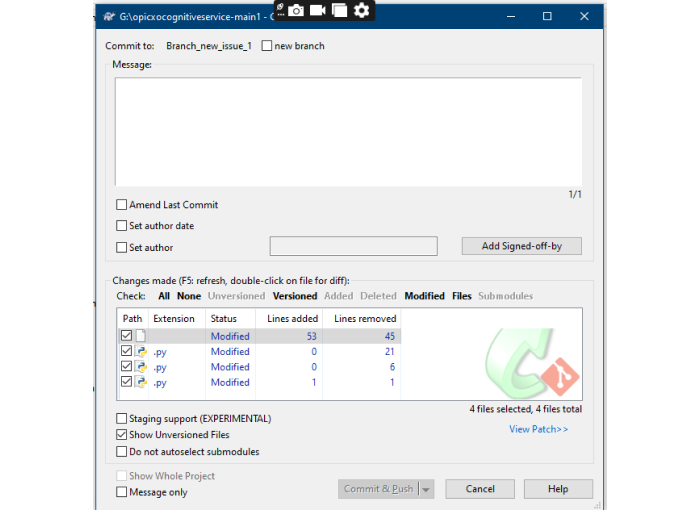
Right-click on the repository folder.
Select TortoiseGit > Push…
Confirm the correct destination branch is selected for pushing.
Click OK and provide authentication credentials if prompted.
Wait for the push to complete successfully, updating the remote repository.
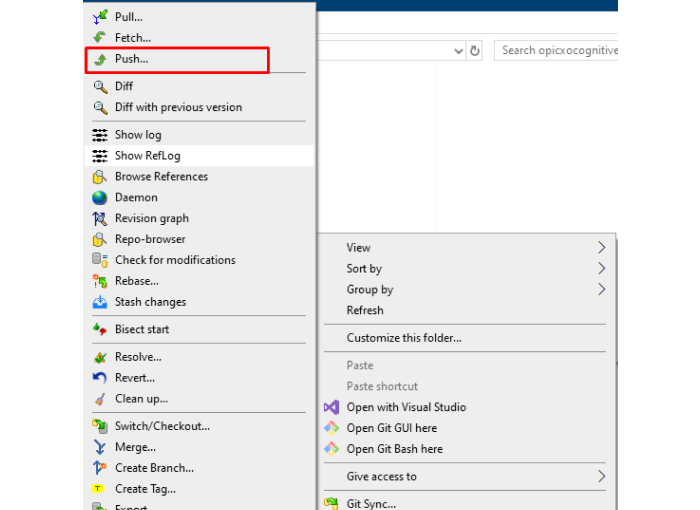
Note on protected branches: If GitLab prevents direct pushes to main or develop, push your feature branch and create a Merge Request instead.
Merging branches in GitLab using TortoiseGit is an accessible, visual way to manage collaboration without relying on the CLI. This approach is especially valuable for developers new to Git or those preferring GUI tools on Windows.
By following these steps:- cloning, configuring, switching branches, merging, resolving conflicts, and pushing changes, you can maintain a clean and efficient workflow in GitLab.
Pro Tip: Always pull the latest changes and coordinate merge plans with your team to minimize conflicts and maintain code quality.
If you found this guide helpful or have questions, feel free to leave a comment or share your experiences.
Leave A Comment