Enjoyed this post?
Be sure to subscribe to the nopAccelerate newsletter and get regular updates about awesome posts just like this one and more!
Launching a nopCommerce store does not have to involve complex infrastructure, high hosting costs, or deep server administration. Whether you are a startup validating an idea, an agency building stores for clients, or a business moving online, the goal is the same: get your store online quickly, securely, and cost-effectively.
Many store owners assume running an ASP.NET eCommerce platform requires a VPS or cloud environment from day one. In reality, a properly configured shared Windows hosting environment can support most early-stage and mid-sized stores with far less overhead.
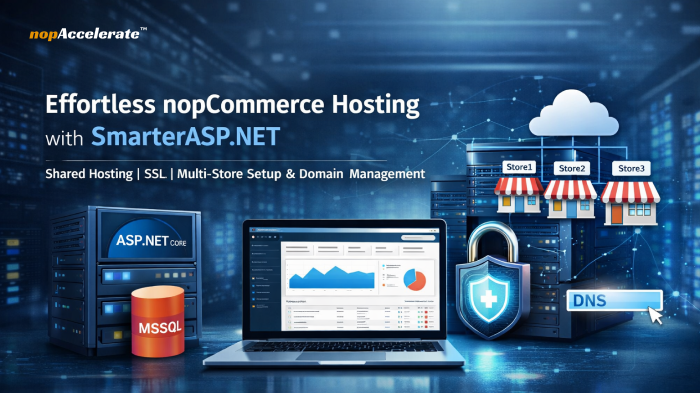
This is where SmarterASP.NET becomes a practical option. With support for ASP.NET Core, Microsoft SQL Server databases, free SSL certificates, and multi-domain hosting, it provides a simplified way to run nopCommerce without managing server infrastructure.
This guide explains how to set up nopCommerce on SmarterASP.NET, when this hosting approach makes sense, and what you gain after implementation.
nopCommerce is built on ASP.NET Core and Microsoft SQL Server. While powerful and flexible, hosting it traditionally involves several technical responsibilities.
You may need to configure a Windows server with IIS, install and bind SSL certificates, set up and secure a SQL Server database, and manage domain bindings for one or more storefronts. For experienced infrastructure teams, this is manageable. For startups and small teams, it can become a barrier that delays store launches and increases costs.
Another common issue is over-provisioning. Many businesses move directly to VPS or cloud hosting before their store generates steady traffic or revenue. This often results in higher monthly expenses and unnecessary system administration work.
Shared ASP.NET hosting is not designed for very high-traffic enterprise systems, but it is often more than sufficient for many real-world eCommerce scenarios.
Shared hosting works well when a store is new or growing, traffic is moderate, and the application does not rely on heavy background processing or complex infrastructure integrations. In these cases, the main requirement is a stable Windows environment that supports ASP.NET Core and MSSQL, not full server-level control.
Shared hosting offers that foundation while removing the need to manage operating systems, IIS tuning, and ongoing security updates.
SmarterASP.NET is best viewed as a pre-configured environment for ASP.NET applications rather than just a generic hosting service. It reduces the amount of manual server setup typically required to run nopCommerce.
| Typical Setup Problem | How SmarterASP.NET Helps |
| Manual Windows server and IIS configuration | Ready-to-use ASP.NET hosting environment |
| SSL certificate installation complexity | Free SSL provisioning from the control panel |
| Database provisioning challenges | Managed Microsoft SQL Server databases |
| Hosting multiple storefronts | Multi-domain and multi-site support |
The result is less time spent on infrastructure and more time focused on configuring products, payments, shipping, and customer experience.
nopCommerce needs a hosting environment that supports ASP.NET Core, Microsoft SQL Server, secure HTTPS connections, and flexible domain management. Rather than configuring these components manually, SmarterASP.NET provides them in a managed shared Windows hosting setup built for ASP.NET applications.
Key advantages include:
This approach is especially suitable for startups launching their first online store, agencies managing multiple client storefronts, businesses operating regional or multi-brand stores, and store owners migrating away from complex or expensive hosting environments. It is also useful for developers who want a straightforward way to deploy an ASP.NET Core eCommerce application.
As traffic and technical requirements grow, a move to a dedicated or cloud environment may make sense. For many businesses, shared hosting provides a practical and efficient starting point.
The following steps walk through the deployment process.
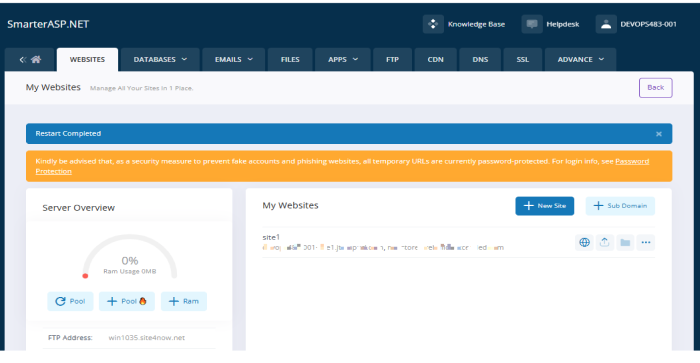
Visit SmarterASP.NET and choose the free trial option. Enter your email address and password, verify your email, and log in to the hosting control panel.
Open the hosting control panel and go to Websites, then Add Website. Enter a site name such as mystore.smarterasp.net and select the latest supported ASP.NET Core version available in the control panel. Save the configuration.
This prepares the hosting environment required to run an ASP.NET Core application such as nopCommerce.
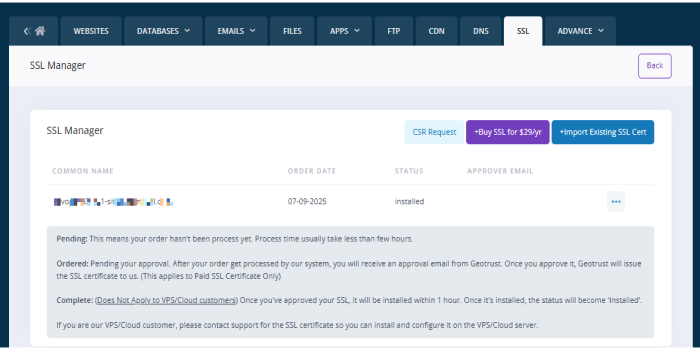
Go to the SSL Manager in the control panel, select your domain, and request a free SSL certificate. After activation, access your site using HTTPS.
SSL is essential for eCommerce because it encrypts customer data and is required by modern browsers.
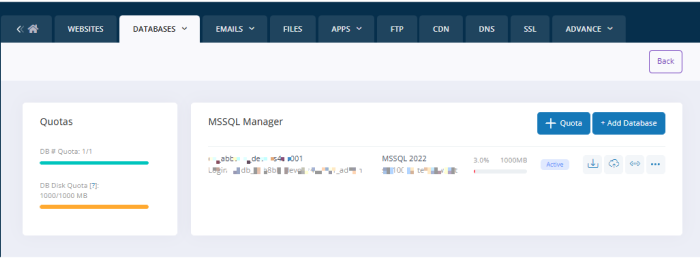
Navigate to the Database Manager and choose Microsoft SQL Server. Create a new database and define a database name, username, and password. Save these credentials for later use.
nopCommerce is optimized for MSSQL, which ensures compatibility and stable performance.
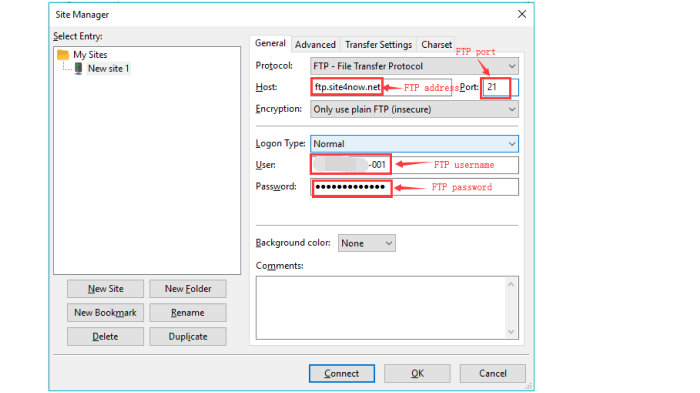
Because the built-in file manager may have size limitations, using FileZilla is more reliable for larger uploads.
Install FileZilla, copy your FTP credentials from the hosting panel, connect to your hosting account, and upload the nopCommerce files into the /wwwroot/ directory.
Visit your site URL, for example – https://mystore.smarterasp.net.
Provide the database type as MSSQL, enter the server name and database credentials from the previous step, and define your admin email and password. Click Install.
This process creates the database structure and links your store to the hosting environment.
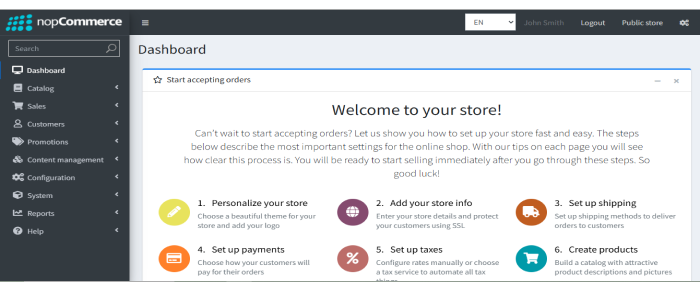
Your storefront will be available at your main domain, and the administration panel can be accessed at /admin. From the admin panel, you can manage products, themes, payments, shipping methods, email settings, and SEO options.
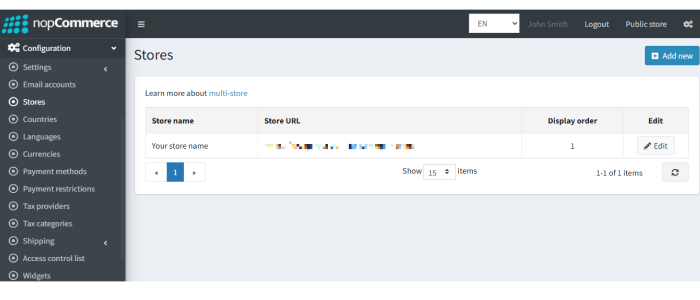
Multi-store allows you to operate multiple storefronts for different brands, regions, or customer groups from a single nopCommerce installation.
In the admin panel, go to Configuration and then Stores. Add a new store, enter the domain such as store2.example.com, and define its language, theme, and currency. Each store can have its own design and catalog while sharing the same backend.
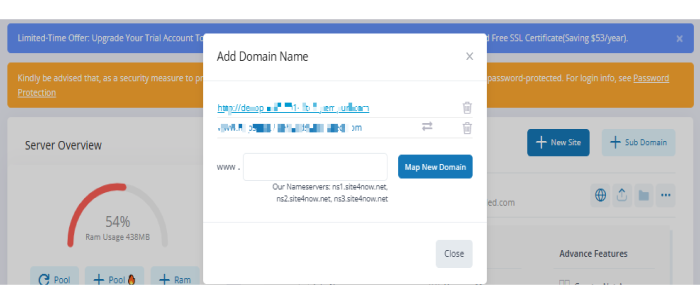
Domain mapping connects your branded domain name to your hosting account.
You can create a CNAME record pointing your subdomain to mystore.smarterasp.net or an A record pointing the domain to the hosting IP address. After DNS propagation, add the domain in the hosting control panel under Domains.
Within nopCommerce, open Configuration and Stores, edit the store, and assign the exact domain name. In SmarterASP.NET, open SSL Manager and request a free SSL certificate for that domain.
This ensures that each storefront runs securely over HTTPS.
To maintain stable performance on shared hosting, enable caching within nopCommerce, optimize product images before uploading, avoid unnecessary plugins, and monitor database size. Regular maintenance helps ensure consistent performance even as your catalog grows.
For many growing businesses, the priority is to launch reliably without overengineering infrastructure. Shared ASP.NET hosting can provide a stable and cost-effective starting point before moving to more complex environments.
Start your nopCommerce store with a 60-day free trial using the link below
http://www.smarterasp.net/index?r=nopaccelerate
If this guide helped clarify the setup process, you can apply these steps to your own store or contact our experts for assistance in setting up your eCommerce store with simple DNS management, FTP access, free SSL, and zero server maintenance.


Leave A Comment