nopAccelerate

Faster, scalable and reliable nopCommerce.

nopAccelerate Blog - Updates, News, Tips & Tricks

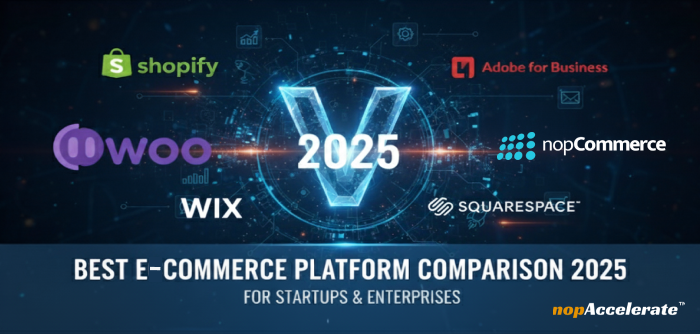
Comparing eCommerce Platforms in 2025: Discover the Top 6 Choices for Growth

Comparison of nopCommerce and other eCommerce platforms for startups and enterprises in 2025

Why Choosing the Right Ecommerce Platform Defines Your Growth

Imagine this: you’ve spent months perfecting your product, building a marketing strategy, and lining up distribution partners. Launch day arrives, and suddenly your ecommerce platform becomes the most important business decision you’ve made.

Your store isn’t just a website; it’s the engine driving sales, customer experience, data, and growth. The wrong platform can slow you down with hidden fees, poor integrations, or limits on customization. The right one becomes a scalable foundation for years to come.

That’s why ecommerce platform comparisons are so critical in 2025. With dozens of solutions available, making the right call means looking beyond the buzzwords and evaluating how platforms perform in real-world business scenarios.

In this guide, we’ll explore six leading platforms — nopCommerce, Shopify, WooCommerce, Magento (Adobe Commerce), Wix, and Squarespace and uncover their pros, cons, pricing, and best-fit business cases.

Why Ecommerce Platform Comparisons Matter in 2025

Ecommerce isn’t new. What’s new is how fast it’s evolving. Businesses no longer ask “Should we sell online?” — the question is “How do we scale, differentiate, and compete globally?”

Global ecommerce revenue is forecasted to reach nearly US $5 trillion by 2030, growing at 6.3% annually between 2025 and 2030 (Statista 2025).

Platforms now compete not only on speed-to-launch but also on security, compliance, and integration with ERP/CRM systems.

When comparing ecommerce platforms, there are five key factors businesses consistently evaluate:

  • Business Model Fit → B2C, B2B, hybrid, or marketplace?
  • Customization → Can we shape it to unique workflows?
  • Scalability → Will it grow with us at $1M, $50M, $100M revenue?
  • Compliance & Security → Can it meet PCI, GDPR, HIPAA?
  • Total Cost of Ownership (TCO) → SaaS fees vs. open-source investment.

Let’s walk through the six leading e-commerce platforms:

1. nopCommerce

nopCommerce open-source ecommerce platform solution

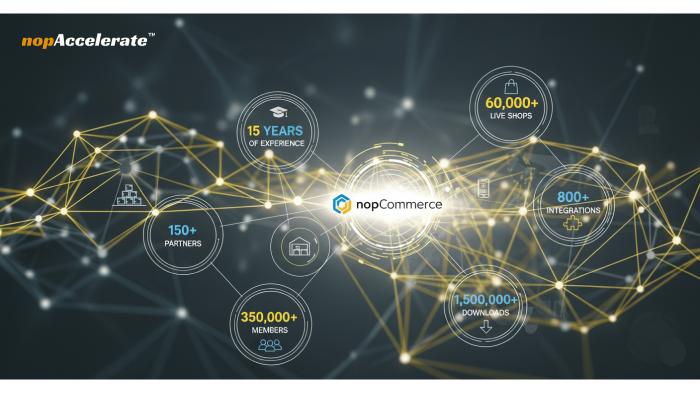
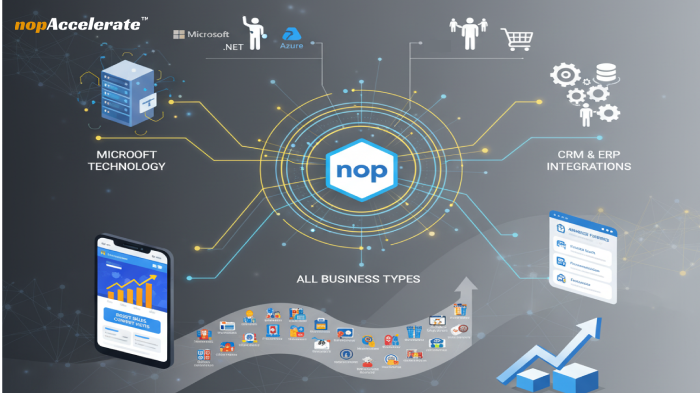
nopCommerce isn’t as widely hyped as Shopify or WooCommerce, but it’s quietly powering 60,000+ live stores, with over 1.5 million downloads in the last 15 years. Built on ASP.NET Core, it’s trusted by brands like BMW, Microsoft, Herbalife, The North Face, Volvo, and Harman Kardon.

nopCommerce enterprise-grade, yet absolutely free and open-source.

Pros:

  • No license fees, no hidden costs, no transaction fees.
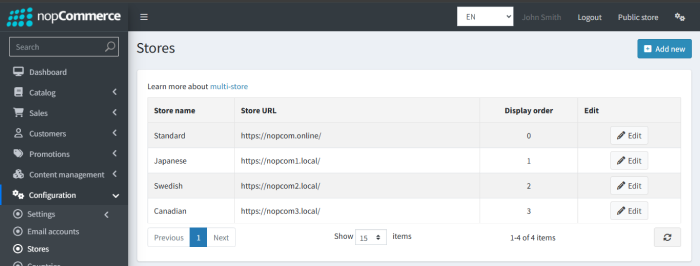
  • Native support for multi-store and multi-vendor marketplaces.
  • PCI DSS compliant out of the box.
  • Limitless customization (you own the source code).
  • 800+ plugins, themes, and language packs available.

Cons:

  • Requires .NET developers for customization.
  • Learning curve for SMBs without technical teams.

Pricing: Free license. Costs are hosting + development (in-house or via nopCommerce partners)

Why Businesses Choose It:

  • SMBs → launch quickly with built-in marketing, SEO, and shipping features.
  • Enterprises → leverage multi-vendor, multi-store, and compliance readiness for B2B and B2C.
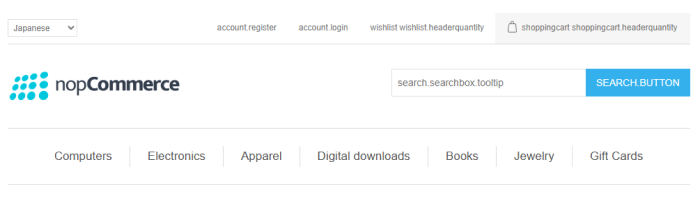
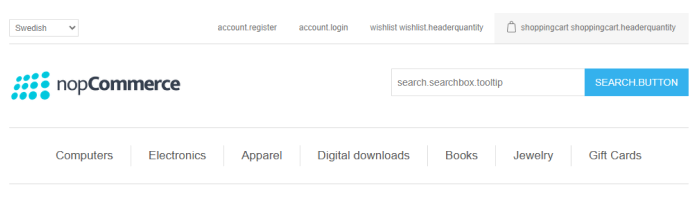
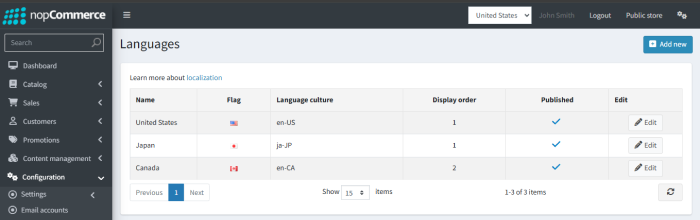
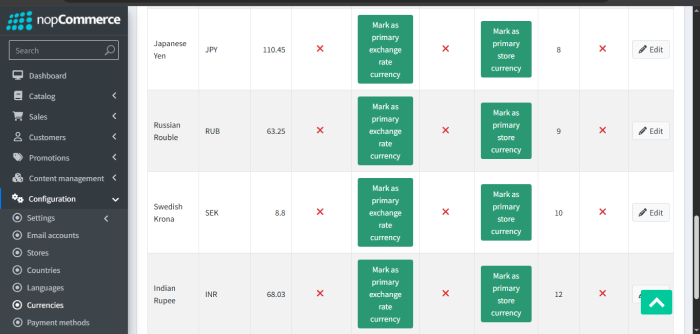
  • Global brands → use GDPR-ready architecture, multi-language, and multi-currency support.

If you’d like a deeper breakdown of who nopCommerce is best suited for, check out our detailed guide: nopCommerce E-commerce Platform: 2025 Guide to Who It’s Ideal For

Mini-Case:

A sustainable fashion brand struggled with slow site speed, weak search, and limited multilingual support on its old webshop. By moving to nopCommerce, they gained faster performance, better branding flexibility, and easy multi-language management — boosting user experience and sales.

2. Shopify

Shopify ecommerce platform online store builder

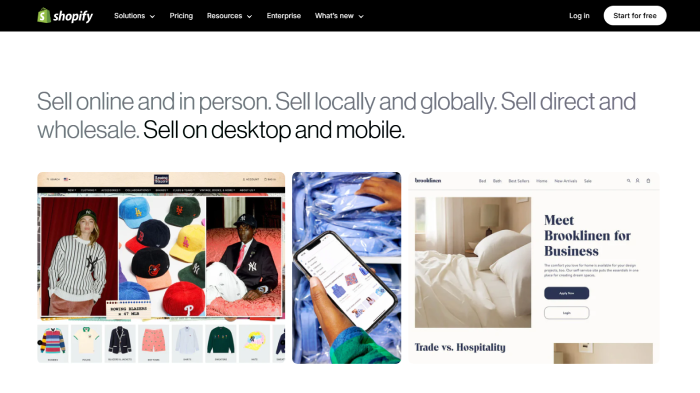
If there’s one name synonymous with ecommerce, it’s Shopify. Powering over 4 million stores worldwide, Shopify is beloved for its ease of use and fast setup. Its SaaS-based model makes it ideal for entrepreneurs and small businesses who want to start selling without worrying about hosting or infrastructure.

Pros:

  • Launch a store in hours with drag-and-drop simplicity.
  • Large app ecosystem (8,000+ apps).
  • Secure SaaS hosting (PCI Level 1).
  • Well-suited for DTC and SMBs.

Cons:

  • Transaction fees unless using Shopify Payments.
  • Limited backend customization (depends on apps).
  • B2B features only available on Shopify Plus.

Pricing: Monthly Price (USD): Starter – $5/month, Basic – $39/month, Grow – $105/month, Advanced – $399/month, Plus – $2,300–$2,500/month

Why Businesses Choose It:

Shopify is ideal for startups and entrepreneurs who want a fast go-to-market solution without worrying about infrastructure.

Mini-Case:

An international lifestyle brand struggled with fragmented systems and inconsistent customer experiences. By adopting Shopify’s unified commerce, they gained real-time data, streamlined omnichannel sales, and achieved 40% customer growth with higher in-store average order values.

3. WooCommerce

WooCommerce WordPress ecommerce plugin store builder

WooCommerce is the natural choice for WordPress-powered businesses. As a free plugin with a massive ecosystem, it transforms a content-first site into a flexible ecommerce store. It’s especially popular among SMBs and content-driven brands that value SEO and control.

Pros:

  • Free plugin with open-source flexibility.
  • Seamless WordPress integration.
  • Great SEO control.
  • Familiar interface for WordPress users.

Cons:

  • Hosting, SSL, backups are your responsibility.
  • Scaling beyond SMB requires heavy plugin use.
  • Security depends on plugins chosen.

Pricing: Total costs typically range from $1,821 on the low end to $67,791+ on the high end, depending on hosting, themes, development, extensions, and marketing.

Why Businesses Choose It:

Perfect for content-first brands, bloggers, and SMBs who want ecommerce directly integrated with their WordPress sites.

Mini-Case:

An oral care company managing nearly a million customers used WooCommerce to improve flexibility and integrations. The platform helped automate marketing and streamline operations, resulting in 47% revenue growth and a stronger repeat customer base.

4. Magento (Adobe Commerce)

Adobe Commerce enterprise ecommerce solution platform

Magento, now Adobe Commerce, has long been recognized as an enterprise-grade ecommerce powerhouse. It offers virtually unlimited customization and advanced B2B features but requires significant investment and technical expertise.

Pros:

  • Enterprise-grade customization.
  • Advanced B2B and B2C support.
  • Strong internationalization (multi-currency, multi-language).
  • Adobe ecosystem integrations (Analytics, Experience Cloud).

Cons:

  • High development and infrastructure costs.
  • Overkill for SMBs.
  • Complex learning curve.

Pricing: Licensing ranges from $22k–$125k/year. Development and implementation add significantly, often requiring large budgets for enterprise readiness.

Why Businesses Choose It:

Large enterprises with big dev teams and multi-country operations use Magento for its robust extensibility.

Mini-Case:

Ulta Beauty, with 44M+ loyalty members, uses Adobe’s Real-Time CDP and Journey Optimizer to power personalized experiences across web, app, and stores. The platform strengthened omnichannel engagement, lifted loyalty-driven sales, and enabled real-time, data-driven personalization at scale.

5. Wix

Wix ecommerce platform website builder interface

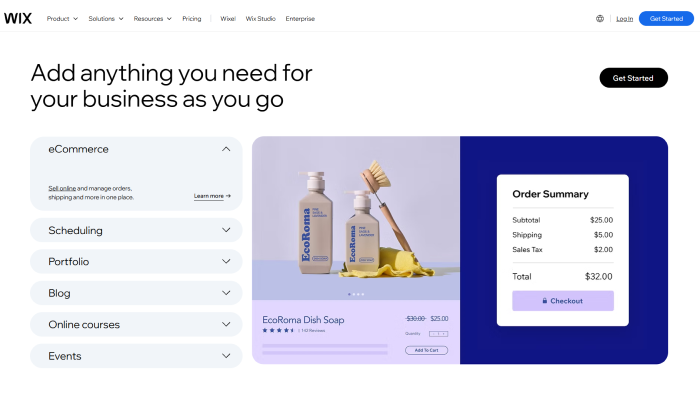
Wix started as a website builder but has grown into a user-friendly ecommerce solution. It’s best suited for small businesses, solopreneurs, and creatives who prioritize design and ease over complex ecommerce features.

Pros:

  • Drag-and-drop design simplicity.
  • Affordable plans.
  • Hosting included.
  • Ideal for small catalogs.

Cons:

  • Limited scalability and advanced ecommerce features.
  • Smaller app ecosystem than Shopify/WooCommerce.
  • Not designed for complex B2B.

Pricing: Wix 2025 plans cost $0 (Free), $17 (Light), $29 (Core), $36 (Business), and $159 (Business Elite) per month, billed annually.

Why Businesses Choose It:

Great for solopreneurs, creatives, or service businesses adding a small shop section.

Mini-Case:

An SEO agency migrated to Wix to escape WordPress maintenance issues. The result: faster load times, improved Core Web Vitals, zero traffic loss during migration, and stronger search rankings thanks to Wix’s built-in SEO and performance tools.

6. Squarespace

Squarespace ecommerce platform website builder design

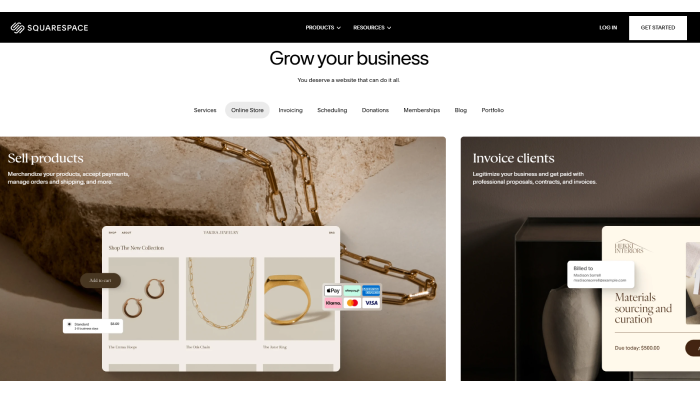
Squarespace is another design-first platform, known for its elegant templates and intuitive interface. It’s particularly attractive to artists, photographers, and personal brands selling a curated selection of products.

Pros:

  • Award-winning templates.
  • Hosting included.
  • Great for personal brands and creatives.

Cons:

  • Limited scalability.
  • Few B2B or advanced features.
  • Smaller app marketplace.

Pricing: Squarespace 2025 plans cost $16 (Basic), $23 (Core), $39 (Plus), and $99 (Advanced) per month, billed annually.

Why Businesses Choose It:

Perfect for artists, photographers, or small creative shops selling a handful of products online.

Mini-Case:

CalArts uses Squarespace Enterprise to help students build portfolio websites that showcase their artistic work. With user-friendly templates, e-commerce options, and SEO tools, Squarespace empowers emerging artists to control their brand, sell creations, and launch careers.

Feature Comparison Table:

PlatformBest ForCost StructureCustomizationB2B FeaturesMulti-Store/VendorCompliance
nopCommerceSMB → EnterpriseFree + DevUnlimitedStrongNativePCI, GDPR
ShopifySMB, DTC brands$39–$2,300/moLimited (apps)Plus onlyLimitedPCI, SaaS
WooCommerceWordPress usersFree + DevFlexibleLimitedVia pluginsPlugin-dependent
Magento (Adobe Commerce)Enterprises$22k–$125k/yearVery highStrongWith Dev workConfigurable
WixSmall businesses$17–$159/moLowWeakNoBasic
SquarespaceCreatives$16–$99/moLowWeakNoBasic

How to Decide Which Platform Fits Your Business

Choosing between platforms isn’t just about features — it’s about aligning with your business stage, resources, and growth goals.

  1. Startups & small teams → prioritize simplicity, low cost, and fast launch (Shopify, WooCommerce, Wix, Squarespace).
  2. Growing brands → need scalability, better integrations, and compliance readiness (WooCommerce, Shopify Plus, nopCommerce).
  3. Enterprises → require advanced B2B features, multi-store, and global operations (Magento, nopCommerce).

Conclusion: Making the Right eCommerce Platform Choice

The landscape of eCommerce platforms is vast, and no single solution fits everyone. By comparing features, pricing, and real-world pros and cons, you now have a clearer lens on where Shopify, WooCommerce, Magento, Wix, Squarespace, and nopCommerce stand in 2025.

If nopCommerce is on your shortlist, take a deeper look at our guide: nopCommerce E-commerce Platform: 2025 Guide to Who It’s Ideal For. It breaks down who benefits most from nopCommerce and when it becomes the smarter upgrade path.

How to Optimize Your Ecommerce Store for AI Search (6 Strategies That Work)

Optimize Your Ecommerce Store for the Age of AI Search

Introduction

AI isn’t just reshaping how people search — it’s redefining why they search.

Before buyer typed: “running shoes size 9 sale.”

Now buyer asks ChatGPT:

“I need durable running shoes for marathon training in humid weather. Which ones won’t wear out quickly?”

See the difference? It’s context-first, not keyword-first

If you run an ecommerce business, this shift matters. Because whether it’s Google Gemini, Perplexity, or ChatGPT, AI tools are no longer just “search engines.” They are product advisors. And if your store isn’t optimized for them, you’re invisible at the very moment your customers are making purchase decisions.

This guide outlines 6 proven strategies that help ecommerce brands future-proof their stores for AI-driven discovery. These are not recycled SEO tips, but practical, tested approaches designed to keep your business visible in the next wave of search.

1. Build AI-Readable Foundations, Not Just Crawlable Pages

Crawlability is the baseline. But AI search is selective — it doesn’t just index, it interprets.

What we see across ecommerce platforms:

  • Shopify stores relying on JS-heavy apps lose visibility in LLM crawls.
  • WooCommerce sites with plugin bloat confuse both Googlebot and GPTBot.
  • Headless setups (React, Vue) often forget to prerender, leaving AI bots blind.

The fix isn’t only “make it crawlable.” It’s make it interpretable:

  • Deliver critical Product Detail Page content in clean, semantic HTML.
  • Reduce “noise” in code (strip unnecessary scripts).
  • Map your site structure logically so AI can understand relationships between categories, products, and use cases.

Think of it like this: Google ranks pages; AI interprets knowledge. Your foundation must serve both.

2. Move Beyond Schema — Design for Machine Understanding

Yes, schema markup matters. But AI doesn’t stop at reading JSON-LD. It triangulates signals from multiple layers:

  • Your structured data (schema, product feeds).
  • Your unstructured context (reviews, FAQs, community content).
  • Your behavioral proof (returns, reviews, consistency across platforms).

Instead of only marking up “Product → Price → Availability,” go deeper:

  • Encode attributes tied to shopper pain points (“sweat-resistant,” “allergy-friendly,” “eco-certified”).
  • Enrich with HowTo schema for usage cases (e.g., “How to wash silk sheets”).
  • Add FAQ schema reflecting customer support questions.

When an AI tool is asked: “Which sheets are best for eczema?”, it doesn’t just pull product names — it looks for encoded context that matches human problems.

3. Treat Product Feeds as AI Training Sets

Most brands see feeds as a Google Shopping requirement. But in the AI era, your feed is your dataset.

Platforms like Perplexity’s Merchant Program and OpenAI pilots are signals of where this is going: AI tools will increasingly lean on structured merchant data to make recommendations.

Don’t think “what’s the minimum info to get listed.”

Think: what dataset would I want an AI to use when recommending my product?

Include descriptive attributes in customer language (“stays cool all night,” not “moisture-wicking synthetic”).

Use consistent product names and categories across feeds, product pages, and collections so AI can correctly recognize and group your products.

Keep feeds updated in real time — AI search favors fresh, accurate inventory.

If your feed is incomplete, AI may overlook your products.

4. Optimize for Prompts and Personas (Not Just Keywords)

Here’s where most brands go wrong: they still chase “keywords” instead of conversational prompts.

AI queries aren’t flat. They are contextual:

  • Persona-based: “I’m a first-time parent looking for safe cribs under $500.”
  • Use-case driven: “Best waterproof backpack for daily cycling.”
  • Problem-solving: “Shoes that don’t cause blisters on long hikes.”

To win here, align your content ecosystem:

  • Product copy: reflect real customer pain points.
  • Category pages: segment by persona/need, not just product type.
  • Blog/FAQs: answer “natural language prompts” your support team already hears.

This isn’t about stuffing keywords. It’s about training AI to associate your brand with specific contexts and personas.

5. Strengthen Brand Presence Across the Web

Unlike Google’s old model, AI doesn’t only cite your site. It pulls from:

  • Reddit threads
  • Quora and niche forums
  • YouTube reviews
  • Trustpilot/Google ratings
  • Affiliate roundups and comparisons

If you want AI to recommend your store, your brand must exist everywhere conversations happen.

Practical moves:

  • Partner with micro-influencers to seed authentic reviews.
  • Actively participate in niche communities (not spam — help first, sell second).
  • Use PR to secure mentions in comparison articles (“Top 10 eco-friendly sheets”).
  • Standardize claims across PDPs, feeds, and marketplaces –consistency builds trust.
  • Engage on social media and encourage people to talk about your brand and products.

Tip: Being visible is only step one; being trusted is what makes AI recommend you. AI doesn’t just count how often you appear — it looks at the quality of mentions. For example, a review that says “great shoes for marathon training” is far more powerful than one that just says “nice shoes.” The more credible and specific your mentions, the more weight your presence carries in AI results.

6. Prepare for the AI Ad Layer(Future-Proofing)

Here’s the part most SEO guides ignore: ads are coming to AI search.

Google is already testing sponsored placements inside AI Overviews.

Microsoft runs ads in Bing Copilot.

Perplexity is now testing ad placements within its platform to help users discover new options.

That means the future of AI visibility is hybrid:

  • Organic AI optimization (schema, feeds, mentions).
  • Paid AI placements (once targeting matures).

Ecommerce brands who prepare early will lock in cheaper exposure before these channels get crowded.

How to Measure Success(AI SEO KPIs)

Unlike rank tracking, AI SEO visibility is probabilistic. Here’s what to measure:

  • Share of answer: % of prompts where your brand appears.
  • Citation mix: Is AI pulling from your site, or third parties?
  • Prompt library performance: Visibility across different personas/use cases.
  • Conversion attribution: Which AI-driven mentions actually result in clicks/sales.

These metrics tell you if AI sees you as relevant, trusted, and solution-oriented.

Conclusion

AI search is the new storefront. Your customers aren’t just searching; they’re asking for recommendations.

To be included in those answers, your ecommerce store needs to:

  • Build AI-readable foundations.
  • Provide context-rich structured data.
  • Treat product feeds as training sets.
  • Align with natural prompts and personas.
  • Expand into the web of mentions.
  • Balance organic AI SEO with paid search strategies

This isn’t about rankings anymore. It’s about earning trust with both machines and people.

The brands that adapt now won’t just survive the shift — they’ll lead it.

nopCommerce E-commerce Platform: 2025 Guide to Who It’s Ideal For

nopCommerce eCommerce platform with product catalog, AI search, and analytics.

When starting or planning a business, choosing the right e-commerce platform is a critical decision, it lays the foundation for your sales, customer experience, and long-term success.
If you are looking for the ideal e-commerce platform to build your store, you’re in the right place. Moreover, if you’re considering nopCommerce but haven’t made the decision yet, read on to discover why nopCommerce is the ideal platform for your business needs.

This blog is for those curious about nopCommerce and e-commerce solutions, seeking the perfect platform to grow their business. Your e-commerce platform isn’t just a tool to drive sales; it’s a digital representation of your brand and values.

nopCommerce platform with 15 years experience, 60,000 shops, 800+ integrations.

nopCommerce is a widely-used e-commerce platform powering over 60,000 live stores, ranging from small businesses to large enterprises, with more than 10,000 new stores launching every year. It has surpassed 1.5 million downloads, and the numbers continue to grow. The platform offers 800+ integrations, including plugins, themes, and language packs, supported by 150+ partners across 40+ countries. Additionally, it boasts a vibrant global community of over 350,000 members and more than 15 years of expertise in the e-commerce industry.

If you want to know more about nopCommerce, check out “All You Need to Know About nopCommerce.

E-commerce has transformed how businesses operate, and platforms like nopCommerce have emerged as game-changers in creating scalable, secure, and highly customizable online stores.

But who is nopCommerce really designed for?

Whether you’re an entrepreneur exploring your options, a developer seeking flexibility, or an enterprise leader planning to scale, this blog will help you decide if nopCommerce is the right choice for your e-commerce needs.

nopCommerce ecosystem with Microsoft technology, CRM, ERP, and business solutions.

Let’s explore who nopCommerce is best suited for and why it could be the ideal choice for your e-commerce journey.

1. Businesses Leveraging the Microsoft Technology Stack

nopCommerce, built on the .NET framework, is an ideal choice for businesses already utilizing Microsoft technologies. Whether your organization relies on Azure, SQL Server, or other Microsoft applications, nopCommerce integrates seamlessly into your existing infrastructure.

nopCommerce serves as a dependable addition to your team, offering a familiar and efficient environment for your business operations.

2. Businesses with In-House .NET Developers

For companies with an internal team of .NET developers, nopCommerce is an ideal platform. Its open-source architecture empowers developers with:

  • Full access to the source code for comprehensive customization.
  • The ability to expand functionality through plugins and integrations.
  • Opportunities to refine their skills by working on practical C# applications.

nopCommerce stands out in the .NET ecosystem as a distinctive open-source e-commerce platform, offering unmatched flexibility and extensive customization options. By utilizing your existing .NET development team, you can create outstanding e-commerce solutions tailored to your business needs.

Moreover, the platform’s structure provides a valuable learning environment for developers, enabling them to deepen their expertise in C# and .NET through hands-on, real-world projects.

Need extra .NET development support to meet tight deadlines?

Our team combines experience and AI-driven programming to help your projects succeed faster and smarter.

 3. Ideal for Both B2B and B2C Models

Whether you’re catering to individual customers or other businesses, nopCommerce has you covered. Here’s how it serves each:

  • B2B: Features such as bulk ordering and customized pricing structures are designed to support complex business relationships.
  • B2C: With a clean and intuitive design, it ensures a seamless experience for customers, allowing them to browse, add items to their cart, and complete their purchases effortlessly.

No matter your business model, nopCommerce provides the tools to help you succeed.

4. Businesses Needing Custom ERP and CRM Integrations

If your business relies on custom ERP (Enterprise Resource Planning) or CRM (Customer Relationship Management) systems, nopCommerce provides exceptional flexibility. With its modular and adaptable architecture, nopCommerce is built to support seamless and efficient integration with a variety of systems, ensuring smooth connectivity with your business tools, such as:

  • Effortless integration with third-party APIs.
  • Connections to custom-built solutions tailored to specific workflows.
  • Compatibility with enterprise systems for optimized operations.

This feature makes it an excellent choice for businesses that require comprehensive synchronization between their e-commerce platform and back-end systems.

5. Suitable for Custom Business Models

Proprietary platforms like Shopify and BigCommerce offer limited customization, making it challenging to align them with unique business models. In contrast, nopCommerce, as an open-source platform, enables extensive customization to meet the specific needs of your business, such as:

  • Creating custom workflows and features.
  • Supporting niche business models that require tailored functionality.
  • Maintaining full control over how your e-commerce site operates.

If your business model is unique and requires a highly flexible e-commerce platform that can be modified to suit your requirements, nopCommerce stands out as one of the best options.

6. If You’re Building a Multi-Vendor, Multi-Store, or Marketplace

Nowadays, most businesses need to go beyond standard e-commerce and look for features like multiple storefronts for each country or market, allowing vendors to connect directly. nopCommerce offers built-in features that support such complex use cases, enabling you to build:

  • B2B marketplace portals like Alibaba.
  • B2C e-commerce platforms like Amazon, allowing multiple vendors to sell their products on your platform.
  • C2C e-commerce platforms like eBay, Craigslist, or Etsy.

These scenarios are often not supported by most e-commerce platforms, making nopCommerce an ideal choice for building your next marketplace website or drop-shipping portal.

7. Businesses or Enterprises with Compliance or Regulatory Needs

Certain industries such as healthcare, finance, and government, require strict adherence to data and operational standards. With nopCommerce, businesses gain full access to the source code, allowing them to:

  • Modify the platform to meet specific regulatory standards, such as GDPR, HIPAA, or PCI DSS.
  • Maintain full control over data security through unrestricted source code access.
  • Facilitate smooth compliance audits with a customizable architecture.

For businesses in regulated sectors, nopCommerce offers a reliable and secure solution.

8. Businesses Requiring Custom Checkout Workflows

Not all businesses adhere to a one-size-fits-all checkout process. nopCommerce enables the creation of custom checkout workflows tailored to unique customer journeys, including:

  • Tiered pricing models specifically designed for B2B clients.
  • Payment options are tailored to meet the needs of various markets and regions.
  • Flexible checkout processes, such as multi-step or single-page workflows.

This level of customization helps reduce cart abandonment rates and enhances the overall customer experience.

9. Businesses Offering Custom Product Content

For businesses that sell products with unique specifications or interactive content, nopCommerce serves as a transformative solution.

Key features include:

  • Support for rich media content such as videos, PDFs, and 3D models.
  • Flexible product attributes to capture and highlight unique specifications.
  • Tools for creating dynamic and interactive product pages to enhance customer engagement.

These features enable businesses to present their products in ways that truly connect with their audience.

10. Perfect for Businesses of All Sizes

From startups to multinational corporations, nopCommerce is built to scale alongside your business.

Key benefits include:

  • Affordability: As an open-source platform, it eliminates licensing and subscription fees, making it a cost-effective solution for small businesses.
  • Scalability: Its robust architecture enables large enterprises to handle high traffic and transaction volumes efficiently.

11. Developers Seeking Skill Enhancement

For individual developers or agencies, nopCommerce offers more than just an e-commerce solution, it provides a platform for learning and experimentation.

By working with nopCommerce, developers can:

  • Gain practical experience in enterprise-level C# development.
  • Create plugins, themes, or custom features tailored to client needs.
  • Engage with an active community of developers to collaborate and grow.

12. Businesses Prioritizing Security and Robustness

Security is a top priority for e-commerce businesses, and nopCommerce offers:

  • PCI DSS compliance to ensure secure payment processing.
  • Regular updates to address potential vulnerabilities.
  • Multi-layered security features, including HTTPS support and database encryption.

For businesses seeking a trustworthy platform, nopCommerce fulfills all the essential requirements.

Final Thoughts

If you’re exploring an e-commerce solution that supports your growth, empowers your team, and delivers on performance, nopCommerce might just be the perfect fit. Its versatility, combined with its open-source nature, ensures that it can be tailored to meet the needs of a wide range of users and industries.

If you have questions or need assistance, nopAccelerate is here to help you navigate your e-commerce journey.

Complete Guide to nopCommerce IIS Setup with Multi-Store, SSL and Domains

nopCommerce IIS setup with multi-store and SSL

Introduction

When we set out to explore a nopCommerce IIS setup with multi-store configuration, our goal was simple: to simulate a production-ready, multi-tenant eCommerce platform in a local environment. However, as every developer knows, the journey from idea to implementation is rarely straightforward. This guide is more than just instructions; it’s a step-by-step walkthrough covering configuration, SSL certificates, and multi-store challenges, along with common errors and fixes.

Whether you’re testing locally before deployment or simply curious about how nopCommerce manages multi-store setups, this post provides practical insights and a structured process you can easily follow and learn from.

1. How to Clone nopCommerce from GitHub Repository

Like every journey, ours started at GitHub.

We began by cloning the official nopCommerce GitHub repository with the following command:

git clone https://github.com/nopSolutions/nopCommerce.git

With the code in hand, we opened the solution in Visual Studio, restored the NuGet packages, and built it. The build process completed smoothly.

2. Hosting and Configuring nopCommerce on IIS Web Server

Next, we created a new site in IIS with the following settings to expose the application on a proper domain locally:

  • Site name: nopcom
  • Physical path: <path-to-nopCommerce>/Presentation/Nop.Web
  • Hostname: nopcom.local
  • Port: 80

We created and assigned a new Application Pool targeting .NET 6.

Error: HTTP 500.19

Cause: Missing IIS modules and rewrite components.

Fix: Installed the IIS URL Rewrite Module, enabled ASP.NET features via Windows Features, and restarted the server.

Once that hurdle was cleared, we updated our hosts file (note: editing the hosts file requires administrator privileges):

127.0.0.1 nopcom.local

3. Enabling HTTPS with Self-Signed SSL Certificates

Security was next. We didn’t want any store exposed without HTTPS.

Using PowerShell, we created a self-signed certificate for the domain:

New-SelfSignedCertificate -DnsName “nopcom.local” -CertStoreLocation “cert:\\LocalMachine\\My”

We bound the certificate in IIS with Server Name Indication (SNI) enabled. However, HTTPS was still marked as insecure.

SSL Access Issue

Problem: Certificate was untrusted by the system.

Fix: Imported the certificate into Trusted Root Certification Authorities.

Now, accessing https://nopcom.local worked flawlessly.

Note: For production, consider using trusted certificates from providers like Let’s Encrypt.

4. Installing nopCommerce

Opening https://nopcom.local in a browser launched the nopCommerce installation wizard.

We configured the database, created the admin user, and the store came to life. The familiar dashboard confirmed a successful setup.

nopCommerce admin dashboard panel for store configuration

5. Setting Up Multi-Store Configuration in nopCommerce

One of nopCommerce’s powerful features is multi-store management. This lets you manage multiple region-specific stores from a single admin panel.

We set up three stores targeting:

Japan

Sweden

Canada

Adding Stores:

Admin → Configuration → Stores:

To map these domains locally, we updated the hosts file:

127.0.0.1 nopcom1.local

127.0.0.1 nopcom2.local

127.0.0.1 nopcom3.local

nopCommerce multi-store setup screen with store URLs

nopCommerce Canadian store front with categories menu

nopCommerce Japanese store front with category navigation

Swedish nopCommerce store homepage with product categories

Error: Cannot Assign SSL URL to Storem

Cause: Certificates were not bound for the new domains.

Fix: Created individual self-signed certificates for each store and added SNI-based bindings in IIS.

6. Language and Currency Customization per Store

To give each store a native feel, we added:

Languages:

English (US)

Japanese (JP)

Canadian English (CA)

Currencies:

JPY (Japanese Yen)

SEK (Swedish Krona)

CAD (Canadian Dollar)

nopCommerce languages setup screen with multiple options

nopCommerce currency setup screen with multiple exchange options

Tip:

If languages or currencies don’t appear correctly, ensure HTTPS is properly configured and store domains are correctly mapped.

7. Assigning SSL Certificates to Each Store Domain

For each new store domain, we generated self-signed certificates via PowerShell:

New-SelfSignedCertificate -DnsName “nopcom1.local” -CertStoreLocation “cert:\\LocalMachine\\My”

New-SelfSignedCertificate -DnsName “nopcom2.local” -CertStoreLocation “cert:\\LocalMachine\\My”

New-SelfSignedCertificate -DnsName “nopcom3.local” -CertStoreLocation “cert:\\LocalMachine\\My”

These certificates were then bound in IIS with SNI enabled.

Site bindings window showing HTTPS port 443 settings.

This allowed SSL check boxes to be enabled in Admin → Configuration → Stores for each individual store.

8. Final Testing of Multi-Store Setup with SSL

We visited each store to verify configurations:

https://nopcom1.local (Japanese store)

https://nopcom2.local (Swedish store)

https://nopcom3.local (Canadian store)

All stores displayed their correct language and currency.

SSL certificates validated successfully. 

The admin panel reflected per-store settings correctly. Success!

Troubleshooting Summary

IssueCauseFix
HTTP Error 500.19Missing IIS modulesInstall URL Rewrite Module, enable IIS ASP.NET features, restart
SSL Certificate IssuesCertificate untrustedImport certificate into Trusted Root Certification Authorities
SSL Store AssignmentNo certificates bound to new store domainsCreate and bind individual certs for each store domain
Language/Currency Not LoadingStore domain not loading via HTTPSBind SSL correctly, clear browser cache

Conclusion

From cloning the repository to configuring a full multi-store e Commerce solution with SSL and localized languages and currencies, this setup mimics a miniature enterprise architecture. It closely simulates deployment and highlights the importance of configuration and environment parity.

Whether you’re a solo developer or part of a team prepping for deployment, setting this up locally gives you both confidence and clarity, helping you troubleshoot effectively before production issues arise.

Pro Tip: For production environments, always use trusted SSL certificates and configure real DNS records rather than self-signed certificates and local hosts file edits.

How to Merge Branches in GitLab Using TortoiseGit: A Step-by-Step Guide

Step-by-step guide to merging branches in GitLab using TortoiseGit

Learning how to merge branches in GitLab is essential for developers and DevOps engineers who want smooth collaboration and reliable code history. Version control is a cornerstone of modern software development, and GitLab, a popular Git repository manager, offers powerful tools for managing branches and workflows. For those who prefer graphical interfaces over command-line Git, TortoiseGit provides an intuitive Windows shell extension to perform Git operations visually.

This step-by-step guide walks you through the complete process of merging branches in GitLab using TortoiseGit, from repository setup to conflict resolution and pushing changes back to GitLab, all without using the command line. Whether you’re new to Git or transitioning from CLI to GUI tools, these instructions will help you merge branches confidently and effectively.

Understanding GitLab and TortoiseGit

What is GitLab?

GitLab is a web-based platform that hosts Git repositories and integrates Continuous Integration/Continuous Deployment (CI/CD) workflows. It centralizes source control, project management, and automation, facilitating collaboration across distributed teams.

What is TortoiseGit?

TortoiseGit is a graphical Git client for Windows that integrates directly with Windows Explorer. It simplifies common Git tasks by providing an accessible interface for users who prefer not to use command-line tools, making it ideal for developers and technical teams embracing GUI workflows.

Prerequisites

Before you begin, ensure you have:

  • A GitLab account with access to the relevant repository
  • TortoiseGit installed on your Windows machine (latest version recommended)
  • Basic familiarity with Git concepts such as branches and commits
  • Proper permissions to merge branches within your GitLab project

Step-by-Step Guide

Step 1: Cloning the Repository (first-time setup only)

Open your GitLab project in a browser and copy the repository’s HTTPS or SSH URL.

In Windows Explorer, navigate to the directory where you want the local copy.

Right-click inside the folder and select Git Clone… from the TortoiseGit menu.

Paste the repository URL into the URL field and click OK.

Wait for the repository to clone successfully onto your local machine.

Note: If you already have the repository cloned locally, you can skip this step.

Clone GitLab repository using TortoiseGit Git Clone option

Step 2: Configuring TortoiseGit for GitLab

If you plan to use SSH URLs:

  • Generate an SSH key if you don’t have one already (via ssh-keygen or PuTTYgen).
  • Add your public SSH key to your GitLab account under Settings > SSH Keys.

Next, configure TortoiseGit with your user details:

  1. Right-click inside the cloned repository folder.
  2. Select TortoiseGit > Settings.
  3. Under Git > Config, set your username and email to match your GitLab identity.
  4. Save and close the settings window.

Tip: You can configure settings globally for all repositories, or locally for this specific repository.

Configure TortoiseGit user info settings for GitLab integration

Step 3: Preparing for the Merge

Before merging:

  • Fetch the latest changes from the remote repository: Right-click → TortoiseGit > Fetch.
  • Then, Pull the target branch to make sure it’s current.
  • Confirm that both your source branch (with the new changes) and target branch (the branch to merge into) are up-to-date.
Open TortoiseGit pull option to prepare for merge

Step 4: Switching to the Target Branch

Right-click the repository folder.

Go to TortoiseGit > Switch/Checkout…

Select the branch you want to merge into (e.g., main or develop).

Click OK to switch your working directory to the target branch.

Switch branches in TortoiseGit to target GitLab branch

Step 5: Merge the Source Branch

Right-click the repository folder again.

Select TortoiseGit > Merge…

In the Merge dialog, choose the source branch you want to merge from.

Click OK to initiate the merge.

Select TortoiseGit merge option to merge source branch

Note:- You are merging the selected source branch into the currently checked-out target branch.

Select source branch in TortoiseGit merge options window

Step 6: Handling Merge Conflicts for Modified Files

If your branches have conflicting changes, TortoiseGit will notify you.

Click Edit Conflicts to open TortoiseGitMerge.

Review conflicting files side-by-side.

  • Mine = your current branch (target).
  • Theirs = the incoming branch (source).

Choose which changes to keep or edit manually.

Save the file, then mark it as Resolved in TortoiseGit.

Commit the resolved files to continue the merge process.

Resolve merge conflicts in modified files using TortoiseGit

Note:- Select all modified files then commit your changes (Ok).

TortoiseGit resolve window showing empty file list

Step 7: Verifying the Merge

Use TortoiseGit’s overlay icons in Windows Explorer to check file status:

  • Green checkmark = clean/committed.
  • Red exclamation mark = modified.
  • Yellow triangle = conflicted.

Note: Icons indicate file states, not merge success/failure. Always test your application locally after a merge to confirm functionality.

Verify GitLab branch merge by checking updated repository folder

Step 8: Commit the Merge

Right-click the repository folder and select TortoiseGit > Commit…

Review all changes in the commit dialog.

Enter a clear and descriptive commit message explaining the merge (e.g., “Merged feature-branch into main”).

Click OK to commit the merge locally.

Commit merged changes to GitLab branch using TortoiseGit

Note:- Select all files for modified by you. Then commit or push or commit&push, also make sure enter a descriptive commit message in the message box.

TortoiseGit commit dialog showing modified files before commit

Step 9: Push the Merge to GitLab

Right-click on the repository folder.

Select TortoiseGit > Push…

Confirm the correct destination branch is selected for pushing.

Click OK and provide authentication credentials if prompted.

Wait for the push to complete successfully, updating the remote repository.

Push merged branch changes to remote GitLab using TortoiseGit

Note on protected branches: If GitLab prevents direct pushes to main or develop, push your feature branch and create a Merge Request instead.

Conclusion

Merging branches in GitLab using TortoiseGit is an accessible, visual way to manage collaboration without relying on the CLI. This approach is especially valuable for developers new to Git or those preferring GUI tools on Windows.

By following these steps:- cloning, configuring, switching branches, merging, resolving conflicts, and pushing changes, you can maintain a clean and efficient workflow in GitLab.

Pro Tip: Always pull the latest changes and coordinate merge plans with your team to minimize conflicts and maintain code quality.

If you found this guide helpful or have questions, feel free to leave a comment or share your experiences.

Fill in form

and we will contact you

How can we help ?

Schedule a quick call, 15-minute meeting with one of our experts:

Thank You !

Our consultant will contact you in 24 hours.

Delivering generous mobile apps for Entrepreneurs, Startups & Businesses


Have a look at nopAccelerate Demo Store with 80,000+ products with nopAccelerate Solr and CDN Plugin.

download-trial Start Trial