Enjoyed this post?
Be sure to subscribe to the nopAccelerate newsletter and get regular updates about awesome posts just like this one and more!
Multi-store is the most awaited feature for nopCommerce using which you can host multiple e-commerce store front-end using single nopCommerce installation. Here is a detailed guide/tutorial which covers the step-by-step guide on How to setup and configure multiple e-commerce stores using nopCommerce multi-store features.
If you want to read a detailed review on nopCommerce Multi-Store and Multi-Vendor features, read our article nopCommerce 3.0 Multi-Store and Multi-Vendor Review.
Throughout the tutorial, we’re going to use shared hosting account offered by SmarterASP.net, which offers superior website hosting services for ASP.Net platform and specializes in offering affordable nopCommerce hosting. We’re thankful to the SmartASP.net for offering us a trial account, as well as their help and support during writing this tutorial. We’re using their Advance Plan for hosting multiple store-fronts using nopCommerce.
To start utilizing multi store features of nopCommerce, you will need:
We are using Shared Hosting Account offered by SmarterASP.net for this setup which offers a One-Click nopCommerce Installation on all of their hosting accounts.
If you’re new to SmarterASP.net, start with their 60 day Free Trial Windows Web Hosting Account today. Click here to Sign Up with SmarterASP.net.
Before proceeding further, make sure you have configured your domain name correctly to map to your shared web hosting account on SmarterASP.NET server.
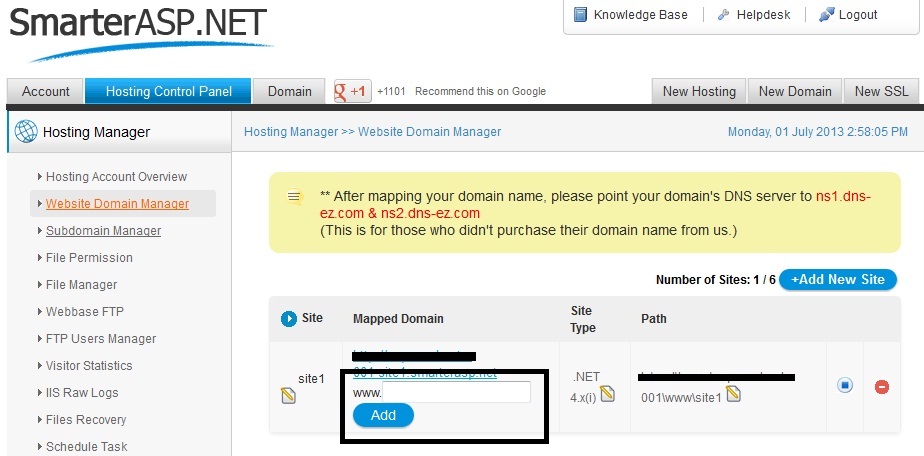
The first step is to map your domain to your site created in SmarterASP.NET. Login to your account at SmarterASP.NET and go to Hosting Control Panel and then Hosting Manager > Website Domain Manager.
You will see your first site already created inside SmarterASP.NET Hosting Control Panel. Click your domain name in the box highlighted and click on Add.
If you are creating multiple-store using nopCommerce multi-store version, then enter the all of the domain names.
We are creating a multi-store nopCommerce website to be published on two sub-domains. So we created two entries here.

Once you map your domain to your website application here, you need to point your domain to this application. There are three ways to point your domain name to correct website account.
We have used CNAME method for pointing our sub-domain to the site we’re creating.
The choice of the above option may vary depending on requirement. Consult with your nopCommerce Solution Provider.
You can now proceed with installation of nopCommerce on your website hosting account.
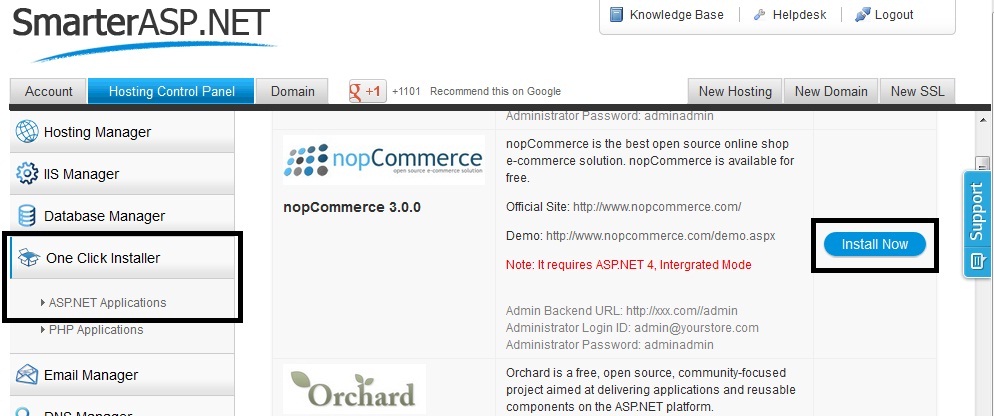
SmarterASP.Net offers One Click Installer to install several ASP.Net applications including nopCommerce. We’re going to use the same to install nopCommerce.
Install nopCommerce using One Click Installer
Go to Hosting Control Panel > Once Click Installer and click on ASP.NET Applications. Find the nopCommerce from the list of ASP.Net Applications and click on Install Now.
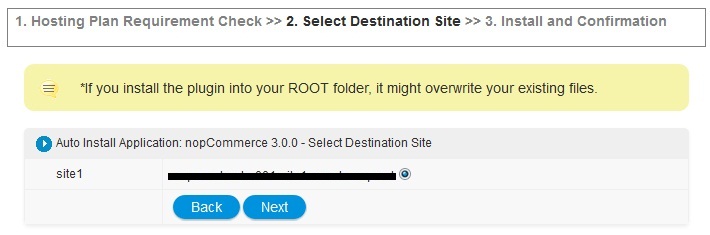
Now, confirm the installation after reviewing the hosting plan requirement by clicking on Next.

Next, is selecting the site where you want to install the nopCommerce application. Proceed with clicking on Next.
Now, the installer will ask you for a Database password.
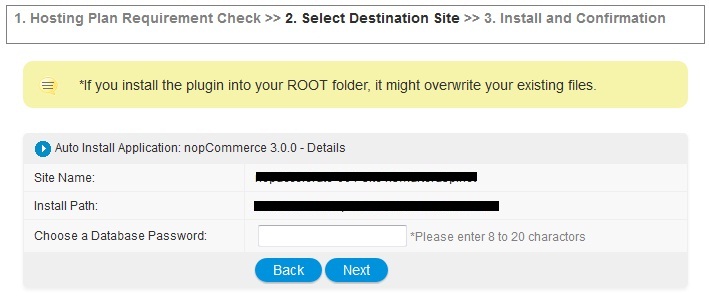
Enter a strong database password. If you cannot think of a strong password, you can use an Online Password Generator to generate secure random password. Once done, proceed to next step by clicking on Next.
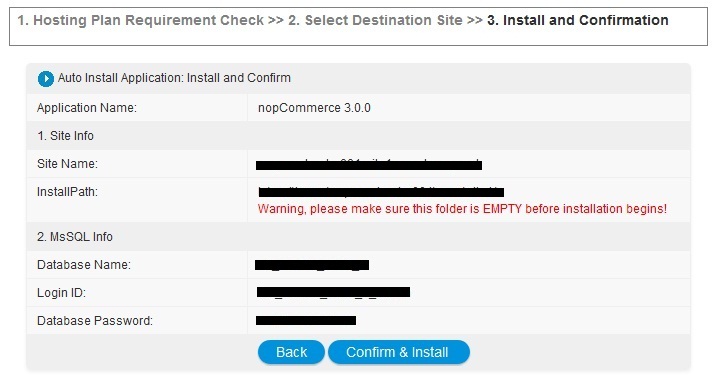
You will be now offered with a final confirmation page with details of the site. Note down the details for your nopCommerce website, and click on Confirm & Install button.
The installer will now install nopCommerce and make it ready for you to use. Once the process is completed, you will be offered with the details of the installed nopCommerce application.
Now, go to your nopCommerce Site URL. You will see home page of your new nopCommerce website.
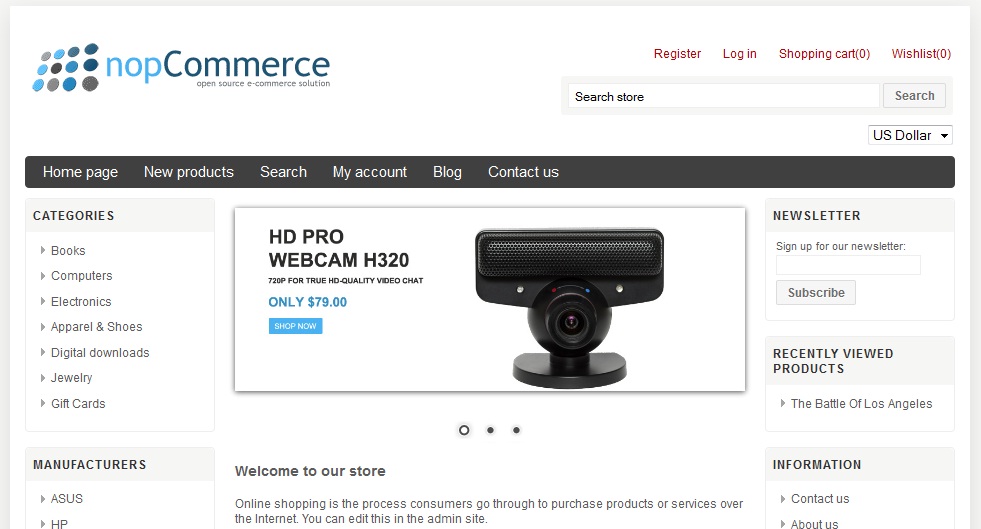
The site will be installed with demo data offered as standard installation. Now let’s proceed to the next step of configuring multiple stores from nopCommerce administration panel.
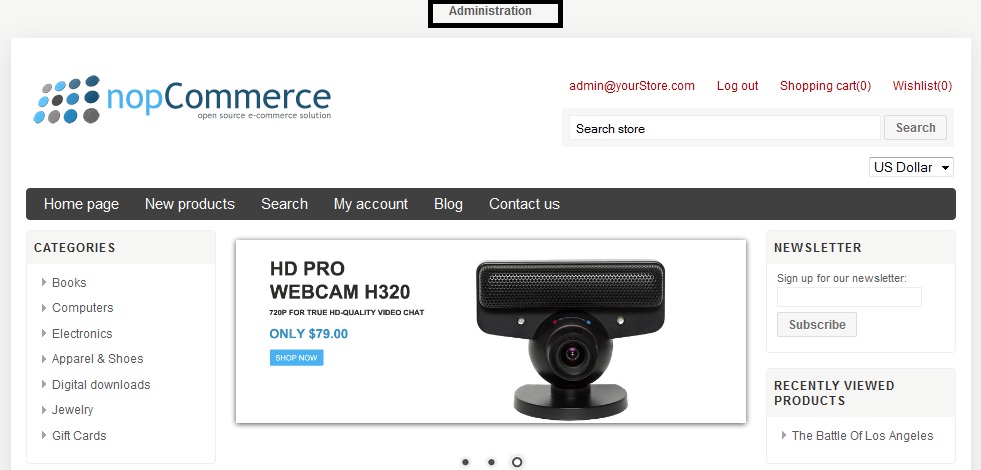
Log into your nopCommerce Administration Panel by clicking on Login link in the header and enter your administrator username and password as offered by SmarterASP.net one click nopCommerce installer.
Once you’re logged in as an administrator you will see a link to Administration on the top of your page. Click on which will take you to the nopCommerce administration panel.
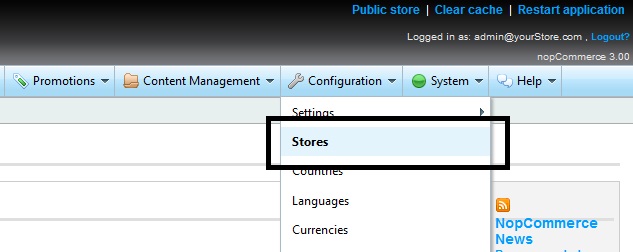
Once you’re in nopCommerce administration panel, click on Stores in Configuration menu.
Before proceeding further with creating a new logical store in nopCommerce, we need to configure our first store correctly. Click on the Edit link to edit the store details.

Once you are on Edit Store Details page. Edit your store details.
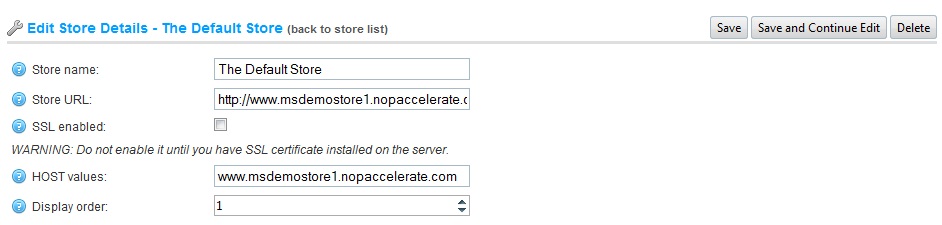
Enter your Store URL and HOST Values. Do not forget to define correct HOST values. This is very important.
The comma separated list of possible HTTP_POST values (for example, “store1.com,www.store1.com” for the first store and “store2.com,www.store2.com” for the second store).
This property is required only when you have a multi-store solution to determine the current store. This field will allow nopCommerce to distinguish requests to distinct URLs and determine the current store. You can also see the current HTTP_POST value on the “System information” page in admin area.
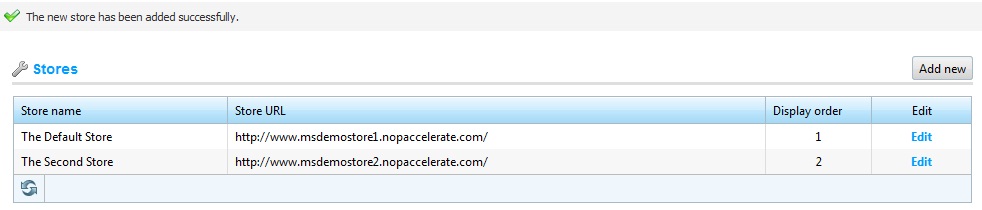
If you are done configuring your store, Click on Save. And now click on Add New button to add new store in nopCommerce.

Note: The test website http://www.msdemostore1.nopaccelerate.com/ is a temporary test site and may not be accessible.
Now let’s proceed to configure another store. Click on Add New button and configure second store.
If you have configured domain mapping correctly as suggested in first step then you can now access the both the site on different domain.
The last step is to test your new multi-store nopCommerce websites. You can now map different theme to each site or map several other entity to the specific store very easily.
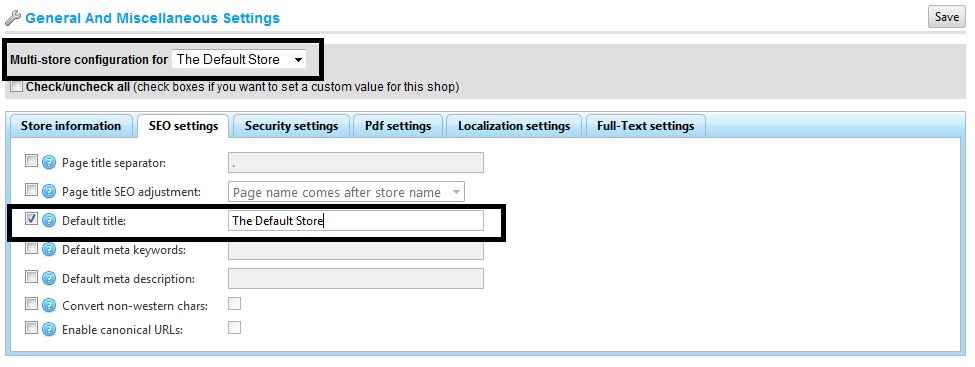
For testing, we are making a very simple separation between two sites by changing the Default title. For actual website you can actually customize it to a deeper level to reflect completely different personality to your site visitors.
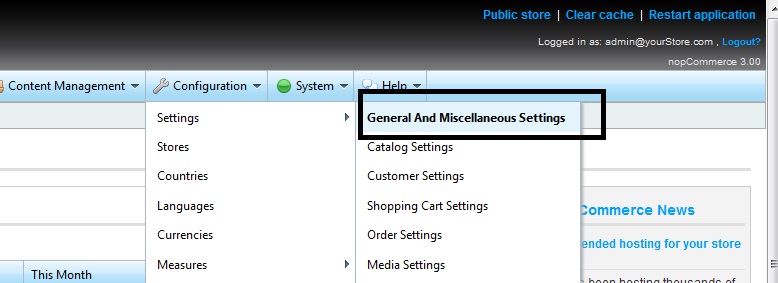
To change the default title, go to Administration Panel > Configuration > Settings > General And Miscellaneous Settings.
Now select the Default Store from Multi-store Configuration drop-down. Click on SEO settings tab and check the checkbox for Default Title and enter it “The Default Store” in value and click on Save. You may actually enter the actual title of the Store here.
Once done, follow the same step for second store. So you have the different default title for both stores.
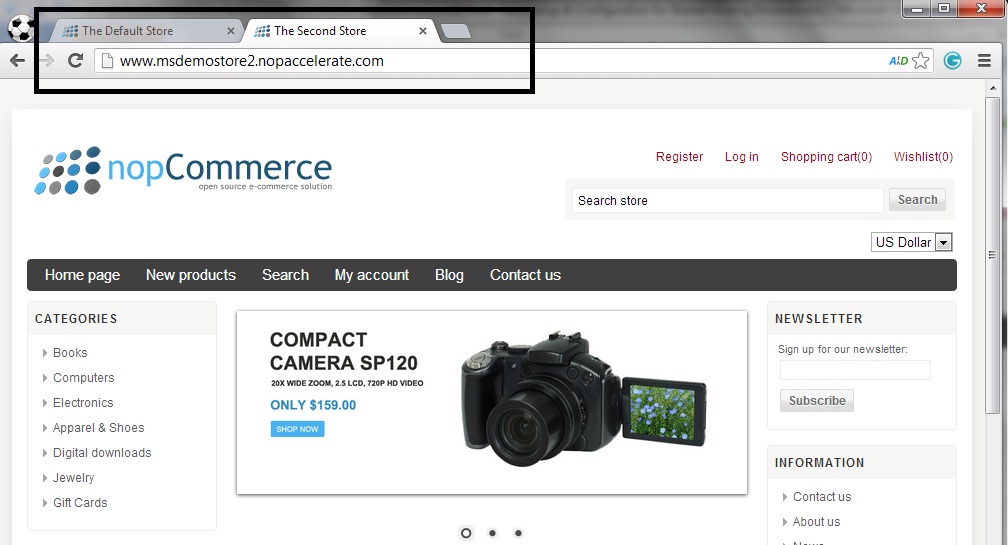
To test, open both the URL in different tabs of your browser and you’ll notice a different page title for both the site.
With the multi-store features offered by nopCommerce, you can actually create a completely distinguished multiple e-commerce sites using the same nopCommerce application and manage it as one store from its integrated and powerful administration panel.
With using nopCommerce as your e-commerce software and an affordable hosting from SmarterASP.Net, you can actually start your own e-commerce business within a few minutes with a multiple store front-end.
nopAccelerate offers nopCommerce themes, plugins and custom development services. We also specialize in nopCommerce performance optimization services.
If you’re looking for a capable and reliable nopCommerce development company, then contact us today.
Comments are closed.