nopAccelerate
Installing nopAccelerate Solr Plugins in NopCommerce 3+
Step by step guide to install nopAccelerate Solr
Plugins and nopAccelerate Plugin Views for integrating Solr with nopCommerce Store.
Applicable to:
- nopAccelerate
- nopAccelerate Search
Adding nopAccelerate View Files to your nopCommerce Theme
nopAccelerate plugins works fine with all the nopTemplate and nopAccelerate themes. However, it requires some efforts to integrate it finely as certain pages are being loaded from nopAccelerate Plugin view pages. To make this integration easy for you, we have worked on integrating our Solr Plugin’s view pages with nopTemplate’s themes.
You will find the folder for supported nopTemplate Themes in our download folder which will include modified Views, Scripts as well as CSS file. All you need to find the theme you’re using, and paste the CSS, Script and View file folders in your theme folder.
Steps for theme integrating:
[Note: We are demonstrating it for nopCommerce 4.00 pavilion theme]
1. Backup your existing Theme Folder
Backup your nopAccelerate plugin and nopTemplate’s theme to safe location.
2. Add supported theme’s view folder to your theme view folder
[Note: Supported theme folders are according to nopCommerce version that you are using, each version contains its own supported theme folder]
Navigation:
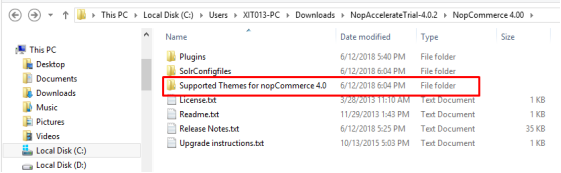
Go to downloaded nopAccelerate plugin folder > Your nopCommerce version > Supported Themes for nopCommerce version as shown in below figure :
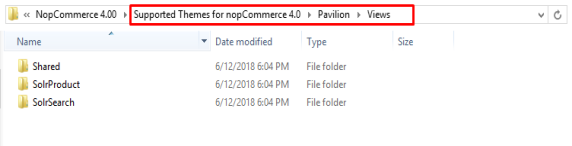
Go to nopTemplate’s theme folder that you are using > Views>
Copy all three view folders i.e. (Catalog, SolrProduct and SolrSearch) as shown in below figure:
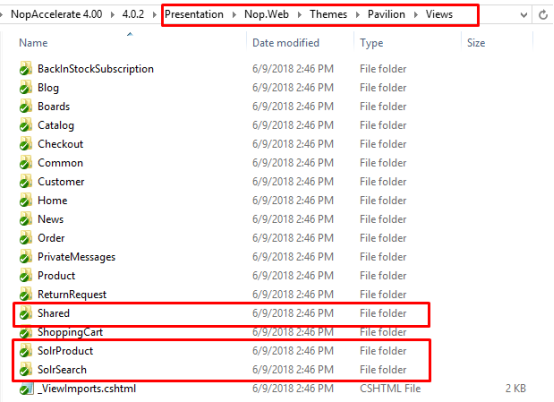
Open your project solution > Presentation > Nop.Web >Themes > Pavilion > Views, and paste all the copied folder from supported theme > Pavilion > Views and over-write existing files as shown in below figure:
3. Add supported theme’s CSS to your theme’s CSS.
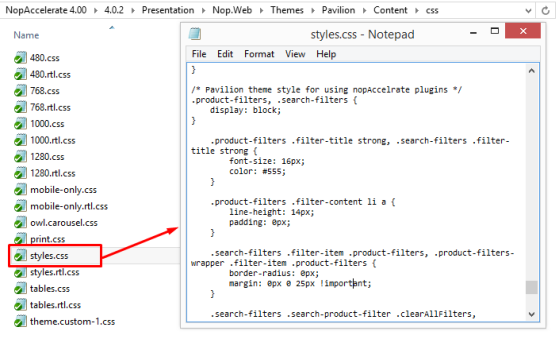
Go to Supported Themes > Pavilion > CSS >copy all contents from CSS
Once you have completed the above process now open Nop.Web >Themes > Pavilion > Content> CSS > Styles.css > paste all the copied content in the end of style.css as shown in below figure:
4. Replace JQuery files in nopAccelerate plugins
Go to Supported theme for nopCommerce > Pavilion > Scripts > XcellenceIT.Plugin.Solr.Products > Copy all script files
Now, open Plugins folder of your solution/code (Presentation > Nop.Web/ Plugins) > XcellenceIT.Plugin.Solr.Products > Scripts > paste and overwrite all copied script here.
Follow same step as above for XcellenceIT.Plugin.Solr.Search plugin’s script
5. You’re done!! Check your enhanced website
Clear cache and refresh full page. Hence, it’ll work fine.
Note: If you have modified nopTemplate’s theme designs, you may need to make some further changes to our modified View templates, CSS and JS files as per your requirements.
Upload nopAccelerate Solr Plugins
Uploading or Installing nopAccelerate Solr Plugins to your nopCommerce is very simple.
Step 1: Upload nopAccelerate Plugins to nopCommerce Plugins Folder
Upload or Copy (after extracting) nopAccelereate Solr Plugin folders to nopCommerce Plugins folder.
Depending on the version of the Plugin you have bought, you may have different files, upload only the Plugin folder and not the rest of the files. Also make sure that you are not uploading Plugin folder directly. The Plugin folder contains folder for each plugins. You need to upload these folder only.

Step 2: Reload List of Plugins from nopCommerce Admin Panel
Log into the Administration area of nopCommerce, and then goto Administration > Configuration > Plugins > click the button “Reload list of Plugins”.
Step 3: Install nopAccelerate Solr Plugins
Once the list reloads, find the NopAccelerate Solr Core Admin Plugin, and click the “Install”. Wait until Plugin is installed & page re-loads.
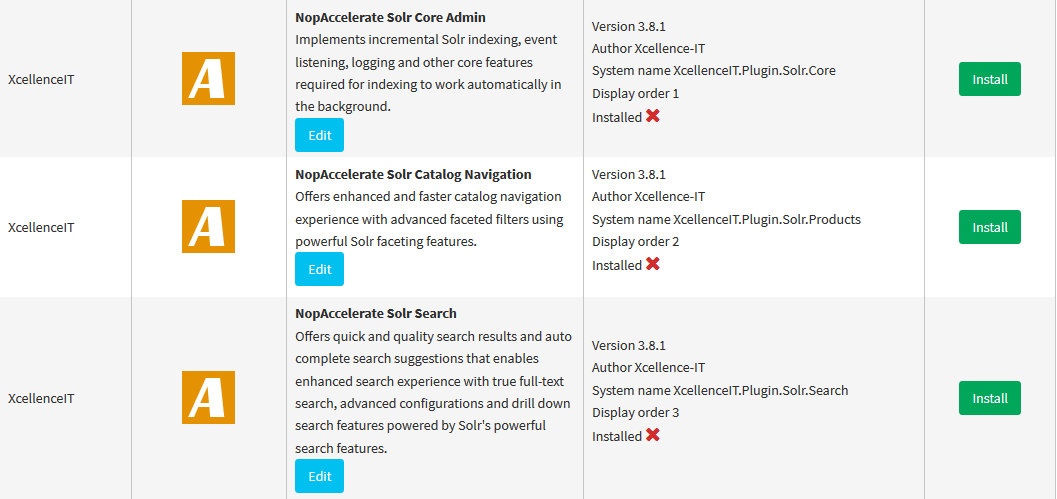
There are may be one or two more plugins that you may need to install. They may be named as NopAccelerate Solr Search & NopAccelerate Solr Catalog Navigation . Please install these plugins too.
Step 4: Open Solr Admin for nopCommerce
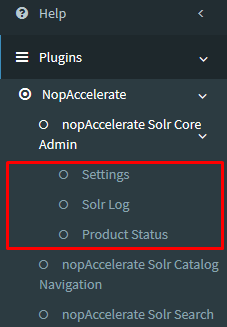
Once the installation is finished for all Plugins, you’ll notice that a new Menu called Plugins will be added to your nopCommerce Administration Menu after Help. Click on a “NopAccelerate Solr Core Admin” to proceed with configuring NopAccelerate Solr Core Admin Plugin.
Here you’ll see other three sub menu.
- Settings
- Solr Log
- Product Status
Hint: Ways to avoid down time while installing nopAccelerate Solr Plugin on Live Site
Do not enable NopAccelerate Solr Search & NopAccelerate Solr Catalog Navigation plugin until you’re done with Configuring NopAccelerate Solr Core Admin plugin and have performed a full indexing for you site. NopAccelerate Solr Search & NopAccelerate Solr Catalog Navigation plugin requires at least some data in Solr index. If there are no data in Solr Index, then Search and Catalog Pages may not work correctly and may appear broken to your visitors during this time.
For Configuring NopAccelerate Solr Core Admin plugin, please refer to the Configuring nopAccelerate Solr Plugin document.
← Back to Configuring Apache Solr to use with nopAccelerate
Proceed with next step to Configuring nopAccelerate Solr Plugins→
Need more help?
- Ask your question in the Forums (free with your plugin purchase)
- Go back to Documentation
Latest Posts


Our Products
Support
Latest Blog Posts
Contact Info